Naturally Dyeing Old Clothes with Food Scraps
Alright, if you saw you my most recent post, you knew this was coming. It’s time to dye the rest of my white shirts with what I’ve been gathering over the past month. Here's what I will be using today:
Dyestuffs
Yellow onion skins — I shamelessly grabbed a handful of these from the grocery store and took them home in a produce bag.
Avocado pits & skins — I’ve been saving these up in my freezer until I had enough without buying like 6 avocados at a time. They’re supposed to produce a dusty pink color.
Cannabis Leaves — My neighbor happened to bring me a whole bunch of these right as I was in the middle of this project (how perfect was that timing?!)
Fabric
1 white t shirt with surf shop logo - 100% ring spun cotton (fancy)
1 white long sleeve shirt - 100% Cotton
1 brand spankin’ new Thrasher t-shirt Bruno got free with subscription - 100% Cotton
1 old white tank top (You’ll see this in some pictures, but I ended up saving it for a future dye session)
At this point, all of my shirts have been pre-treated by scouring and mordanting. Check out more on that process in my earlier dyeing post.
I probably spent the most time deciding what to do to each shirt (which is why I ended up saving one for later, haha). My art style tends to be wayyy different than my clothing style. I usually go for neutrals and solid prints in my outfits, but if I was dyeing a non-wearable tapestry right now, I would make it bright pink and yellow and blue with funky patterns. Basically, I spent sometime brainstorming subtle tie-dye patterns that I would actually wear.
Onion Skins
I tried onion skins first because it was a pretty well recommended dyestuff for beginners and I like a first-time success. I read somewhere that “yellow is Mother Nature’s favorite color” and after seeing the vibrant yellow ONION SKINS could create, I have to agree. Plus, a lot of other natural dyestuffs will produce yellow as well (marigold, turmeric, pomegranate rinds). I’m excited to eventually try them all and compare all my yellow samples.
The color extraction process was even easier than I thought it would be. I simply dumped my bag of onion skins into a pot, added enough water to cover them and let it simmer for 30 minutes. You could already see the color developing after a few minutes in the pot! When it was done, I strained it over a bucket and composted the solid bits.

I'm using my surf shop t-shirt for this one, and decided to go for kind of a marbled effect. To do that, I laid my shirt out flat and scrunched it up into tight ripples and secured with rubber bands. When it was ready to go, I pre-wet my bundle and added it to my strained dye bath. I took it out after 30 minutes and revealed the most beautiful yellow color.

This is exactly what I was going for with the marble effect, too. It’s nothing fancy, but it looks SO nice (I ended up using this technique for the other t-shirt too). Also, I’ll say it again: this yellow is AMAZING! I am so impressed something like thin, papery onion skins (that I took from the grocery store) made such a stunning color. I’m already planning what color mask to wear to best compliment this shirt for it’s debut (a joke, but not really.)
Cannabis Leaves
My original plan for this project didn’t involve cannabis leaves at all, but my neighbor happened to be pruning his plant this week and gave me a bunch of discarded leaves — I wanted to be sure to use them fresh. I was interested in dyeing with this plant anyways because apparently it is one of the very few objects in nature to produce green. Which is kind of ironic (even though it does makes sense scientifically, but we don’t need to get into that right now).
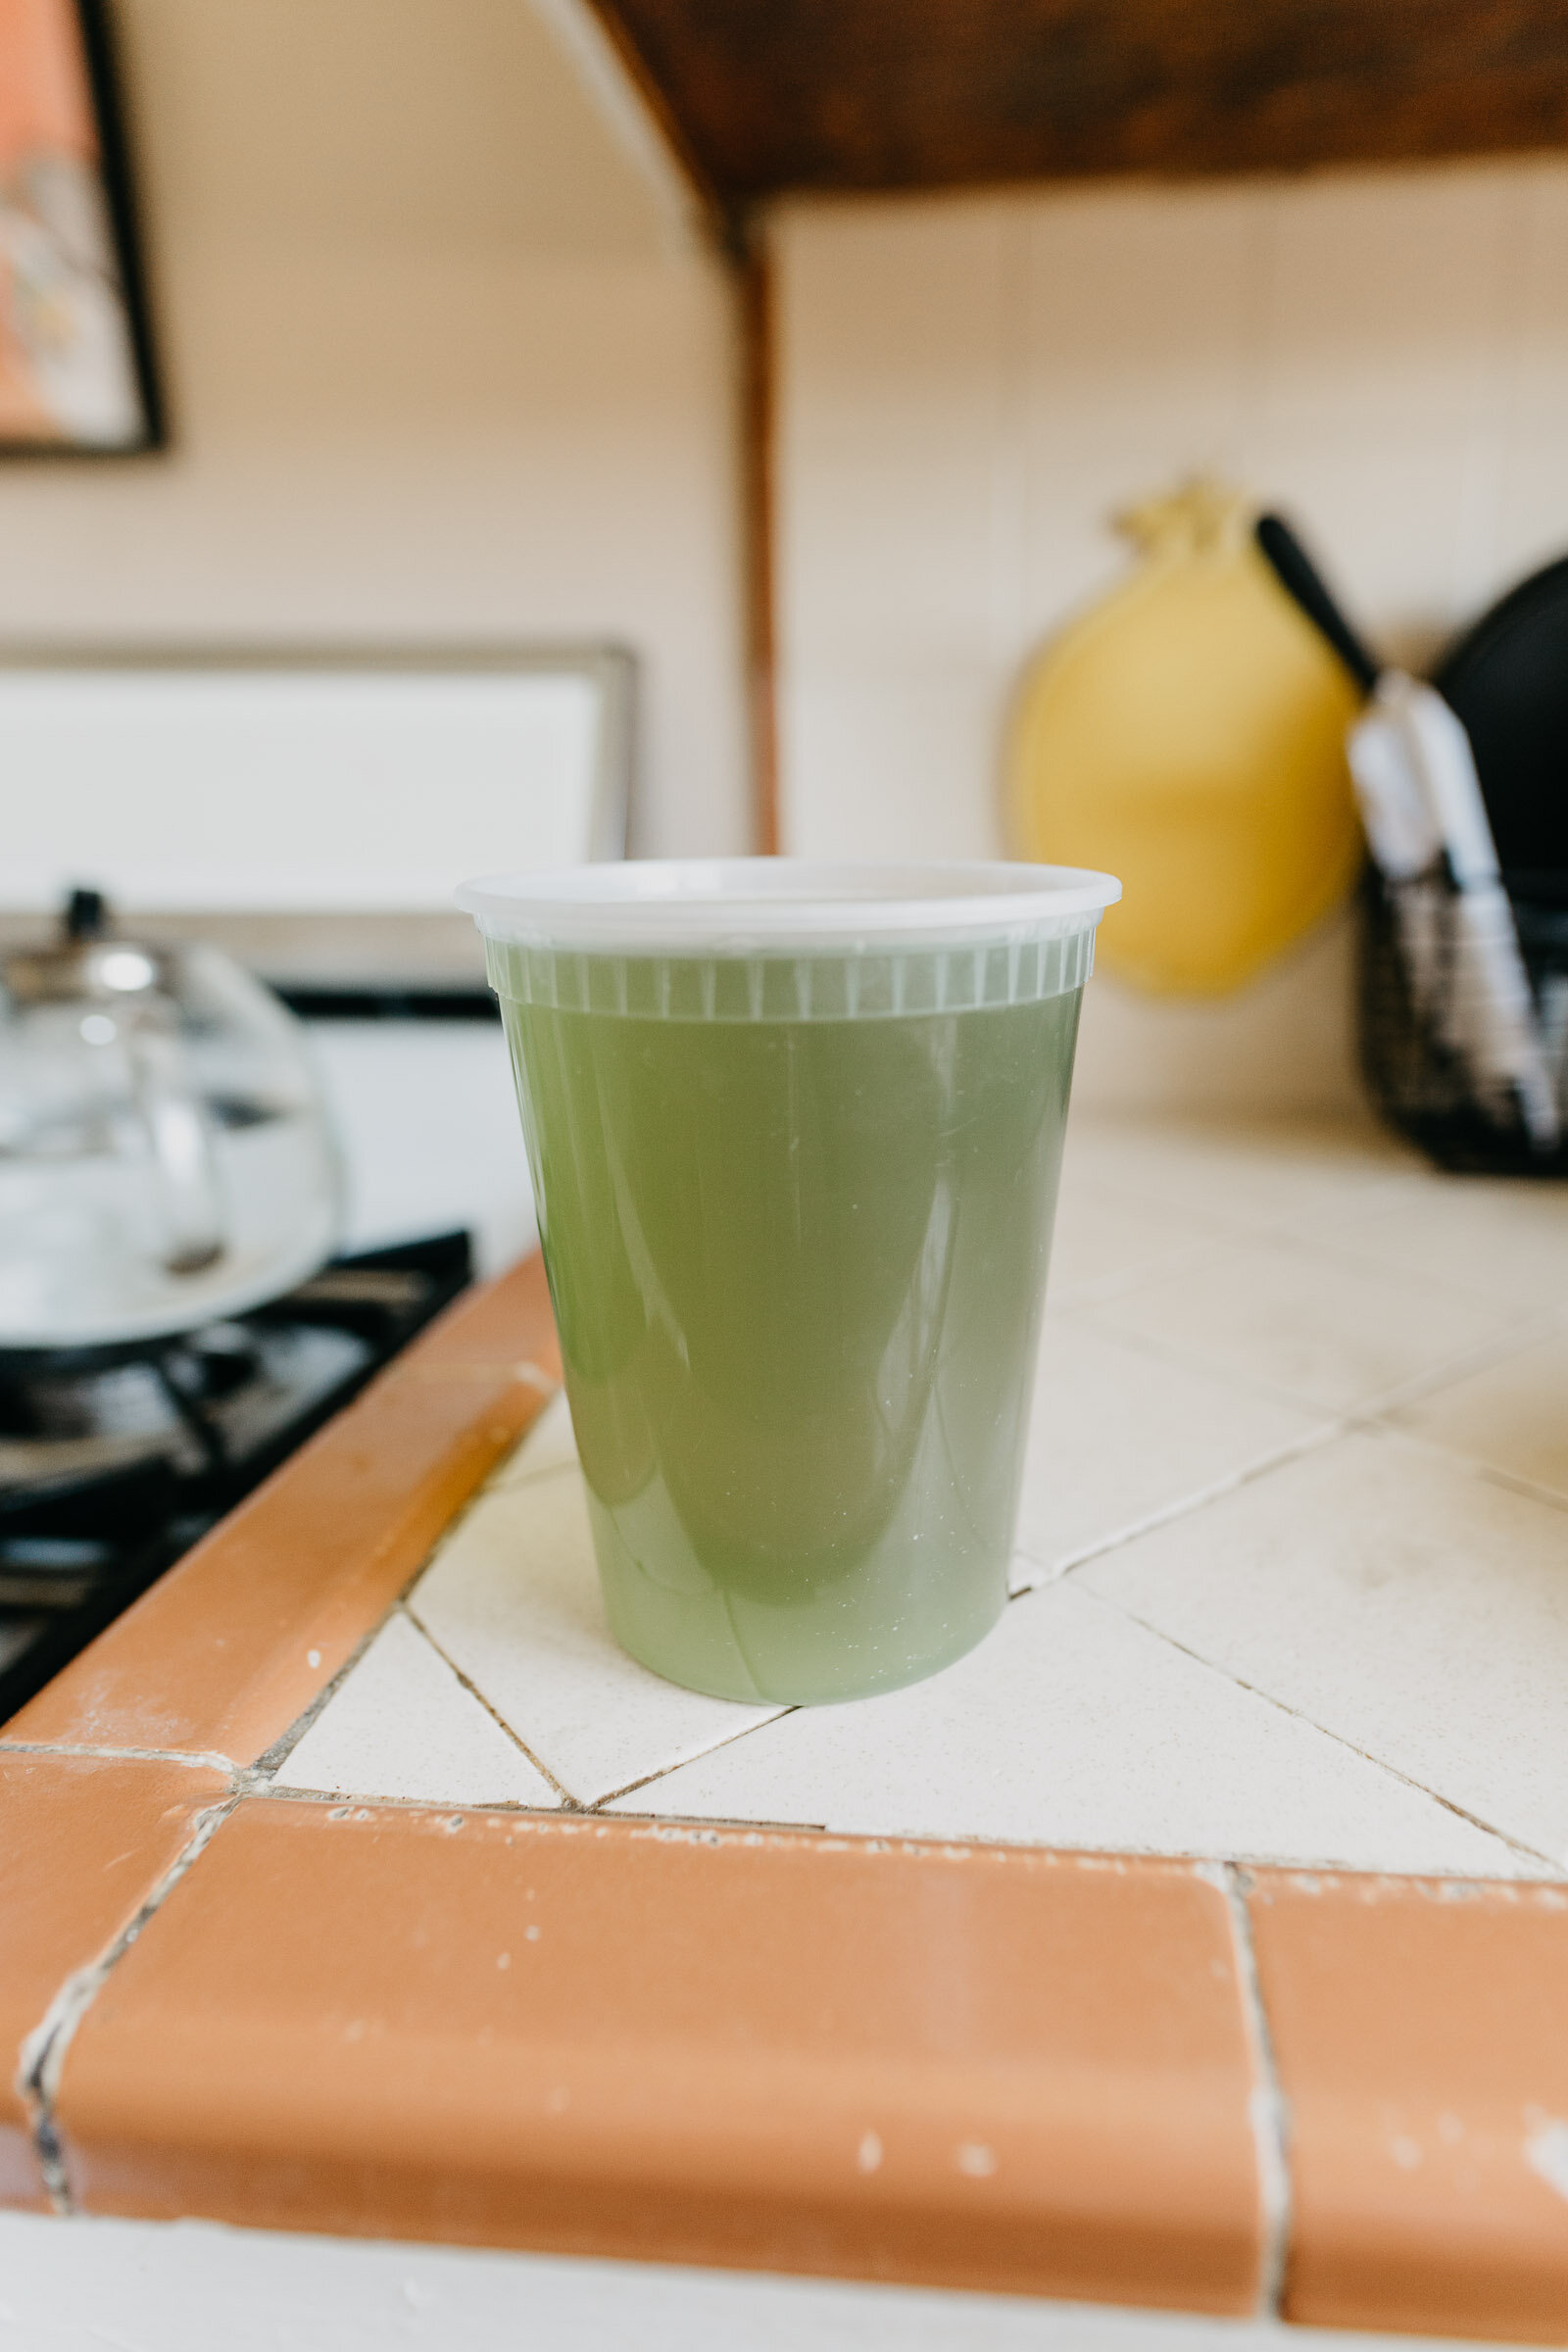
To extract the color from the leaves, I chopped them up super fine, added them to a pot and added water. I let this simmer for 40 minutes, then strained it through cheesecloth. Then I put the solid bits back in the pot and did it again, to get out as much dye as possible.

My cannabis leaf dye bath before I strained it (LEFT) and the solid bits after I extracted all the moisture I could (RIGHT)
When I got as much color as I could out of the leaves, I put the liquid back in the pot & added my shirt. I tried dying this one over heat in attempt to get a more saturated color but I don't think it made much of a difference.
For this shirt I used a modified shibori technique called ne-maki. Traditionally, I would use thread to create a nice perfect circle — I went for more of a “blob” shape. It’s basically just a loose running stitch around your preferred shape, then you pull tight to bunch up the center. Then I wrapped the end of my thread tightly around the little pony-tail I’ve created, creating more resists (or more places for the dye to resist the fabric). I did 3 of these in the center of the shirt and a little bit of marbling on the sleeves. The pattern turned out SO cool; the color, however, was underwhelming.

I edited the colors slightly on this photograph so you could see the pattern more clearly, but in person, the contrast between the green and white is sooo subtle. You’ll see this in other photos below.
I only had about 10 grams of leaves in my dye extraction, so that might be why the color is so light. Next time I’ll try to use a more concentrated dye for a darker green. I considered experimenting on this shirt with post dye processes (like an iron bath) but it sounds kind of messy right now. I think I’m going to wear it for a bit and re-dye it eventually.
Avocado pits & skins
And finally, the avocados — which I was actually the most excited for because they’re supposed to extract a dusty, light pink. Mine didn’t turn out quite as rosy as I’ve seen others online… but I’m actually super stoked on the outcome and I think I’m going to wear this shirt a lot. And definitely try dyeing with avocados again.
I used the same process as all the others for this dye bath; cleaned avocado pits and skins go into a pot, add water to cover, and heat. Then strain the solids and add your fabric to the bath; I used my Thrasher shirt and did the same marble-scrunch tie-dye as earlier with the onion skins. I kept checking the color throughout the dye process, initially thinking “ugh, it’s so brown”. I left it in the dye bath for nearly 2 hours before I rinsed it out and when I unbound it —oof, that’s a beautiful brown. It’s like the perfect greige-brown and you can see the pink tones in some light, talk about subtle tie dye!

It’s like a perfect happy accident of naturally dyeing: you never really know how it will turn out but it will always be beautiful, since the colors in nature are so vivid and complex and the dye results are universally flattering.
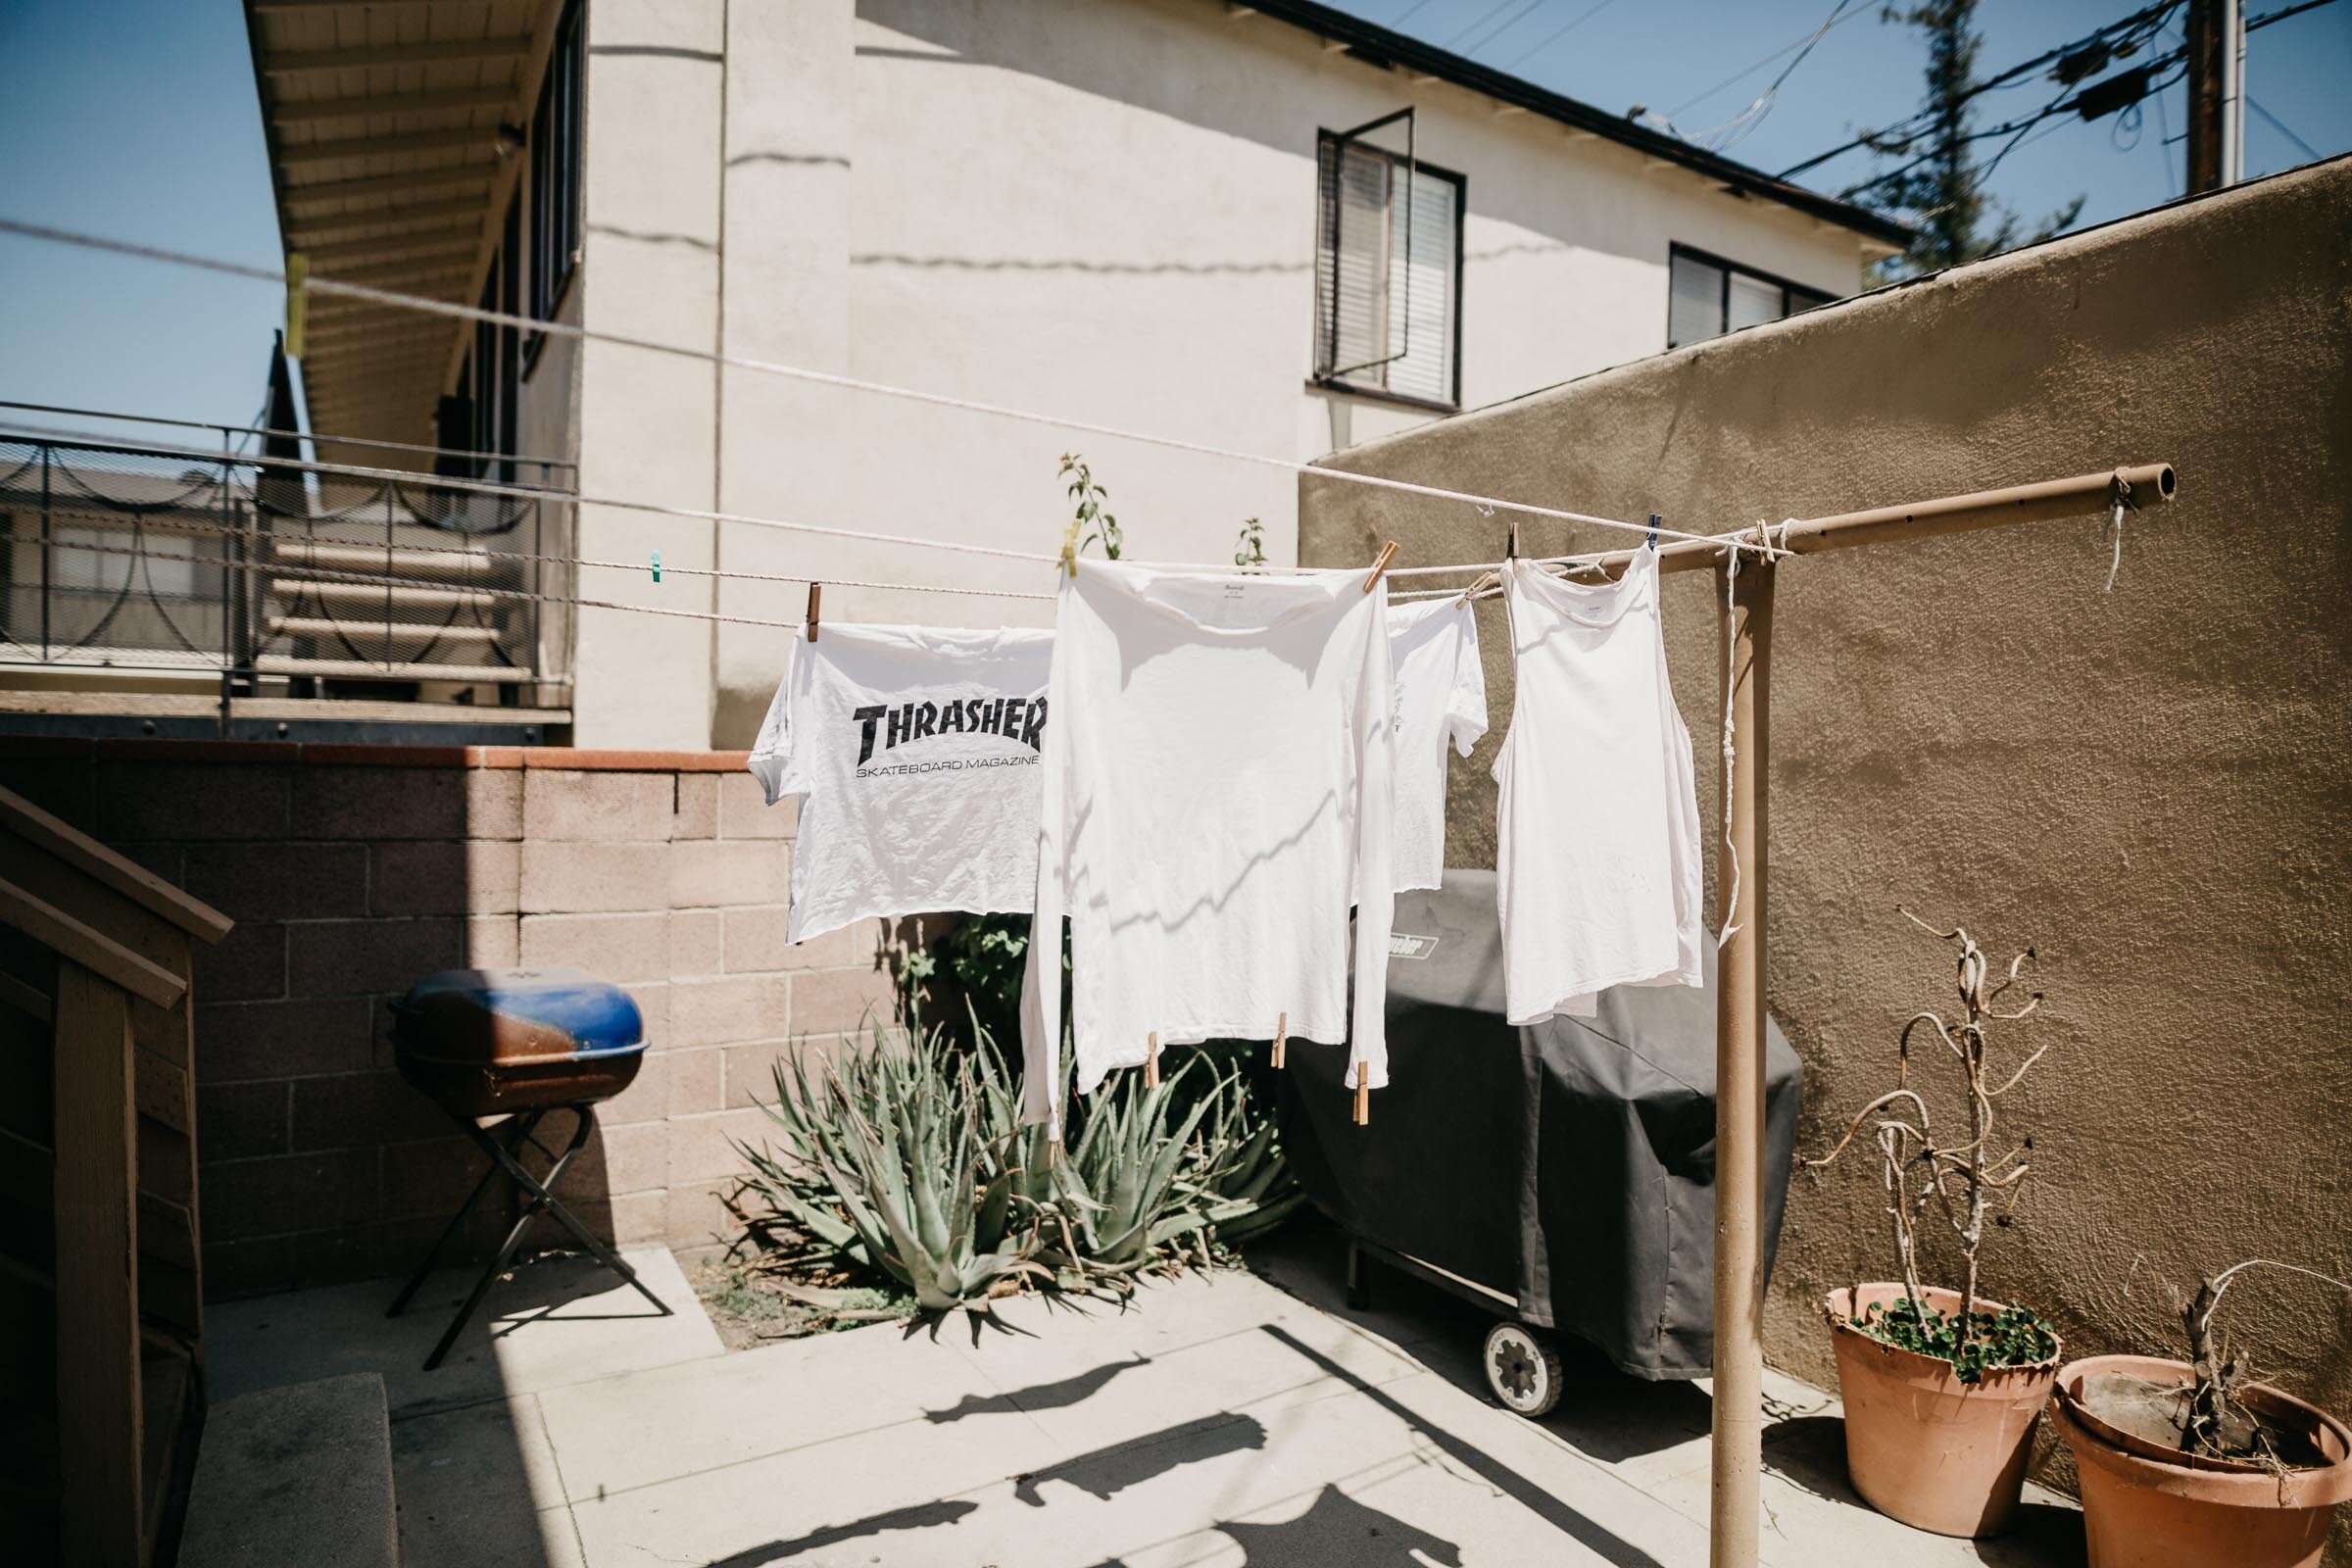
After the first Wash
My shirts hung outside to dry and the next morning I ran them through my washing machine with the rest of my white and light clothing. I had every intention to let them have their own cycle with fancy pH neutral detergent (as recommended), but I have to pay for laundry at my apartment complex so I chose to bulk up my load & use Tide.
The Onion Skins kept their color incredibly. It actually may have gotten better; a little deeper, closer to orange. It’s so nice (and doesn’t smell like onions)
The Avocado color developed beautifully. It got a little darker and the pink tones are a slightly more visible. I really looks pink in the sunlight. This is my favorite of the three.
The Cannabis faded soooo much. It was light to begin with but now you can barely see the green (this might be because of my use of detergent, but realistically, I would wash it with my regular load eventually). My options now are to try soaking it in an iron bath to modify the green color, or re-dye the whole piece later. Either sounds like a good option to me :)
I really can’t wait to wear my beautiful, newly dyed pieces — and I actually won’t have to wait long because I go back to WORK tomorrow! I got a few weeks of work back at my old job with the production department, and I cannot complain! It will be so good to get back on a schedule and see people everyday (from 6ft away of course).
Check out more photos from the dyeing process and my finished shirts below!