Eco Printing for the Dye Newbie

Well, I accidentally paid for a premium Skillshare account this year. I was getting risky with multiple free trials so I can only blame myself… but I’ve been making the most of my purchase and taking some classes (or even just listening to someone talk about their craft is better than TV sometimes).
Skillshare is mainly populated with illustrators, graphic designers and the like, so The Dogwood Dyer’s video on transforming clothes with food dyes really stood out to me. I loved it because not only was she creating incredible colors, she was using food and plant scraps that would otherwise be totally looked over or thrown away. There’s also so much variety in the process! Fabric type, dye material, dye potency… and then you can alter the colors even further by changing the pH with baking soda, iron salt, or lemon juice. Then you can experiment with shibori and tie dyeing techniques… there are ENDLESS possibilities of creations with this process. And you don’t know how it’s going to turn out until the end!! I’m too excited for this.
You can watch that same video by The Dogwood Dyer HERE
I watched the full course, then did my own research, followed the appropriate subreddits and found the right blogs to really dig myself into this. I started collecting my food scraps and bringing a bag on my morning walks to collect wildflowers, feelin’ so connected to the earth — ahhh.
Here’s what I collected:
Yellow onion skins — I shamelessly grabbed a handful of these from the grocery store and took them home in a produce bag. They should extract an orangey-yellow color
Avocado pits & skins — I’ve been saving these up in my freezer until I had enough without buying like 6 avocados at a time. They will make the most beautiful dusty rose color!
Dried Marigold Flowers — These came in a dyeing kit I ordered directly from The Dogwood Dyer along with some mordant, iron salt, and other materials that are going to be fun to play with.
Cannabis Leaves — My neighbor happened to bring me a whole bunch of these right as I was in the middle of this project (how perfect was that timing?!)
Cochineal — I went ahead and ordered a 2oz pouch of these online from Dharma Trading Co. because I remember learning about them at the Huntington Library. They’re actually a type of scale, which is a pest that shows up frequently on cactus. They’re white at first, but when you squish them up they make this crazy bright red color!
Hibiscus Flowers — There were so many beautiful hibiscus bushes around my apartment (until someone cut them all down??? I’m not sure why anyone would, but I digress) Anyways, I snagged a bunch of the flowers before it was too late.

The first steps are to prepare my fabrics; this is the most boring and time consuming part of the process but it’s apparently necessary so I’m not gonna fuck around.
Step 1: Scour
Scouring is the process of washing your clothes to remove any natural & man-made barriers on the fabric that can prevent a good adhesion of color. Procedures vary for different types of fabric, but since I am using all cotton items, I can scour them all together.
To properly do this, I would have bought some soda ash. However, it looks like everyone is out there scouring and tie-dying in quarantine, so I wasn’t able to find any at my local art supply stores. I found one article online about making your own soda ash by putting baking soda in the oven at 400 for an hour, so I am giving that a shot. It’s probably not optimal conditions, but hopefully it’s better than nothing!
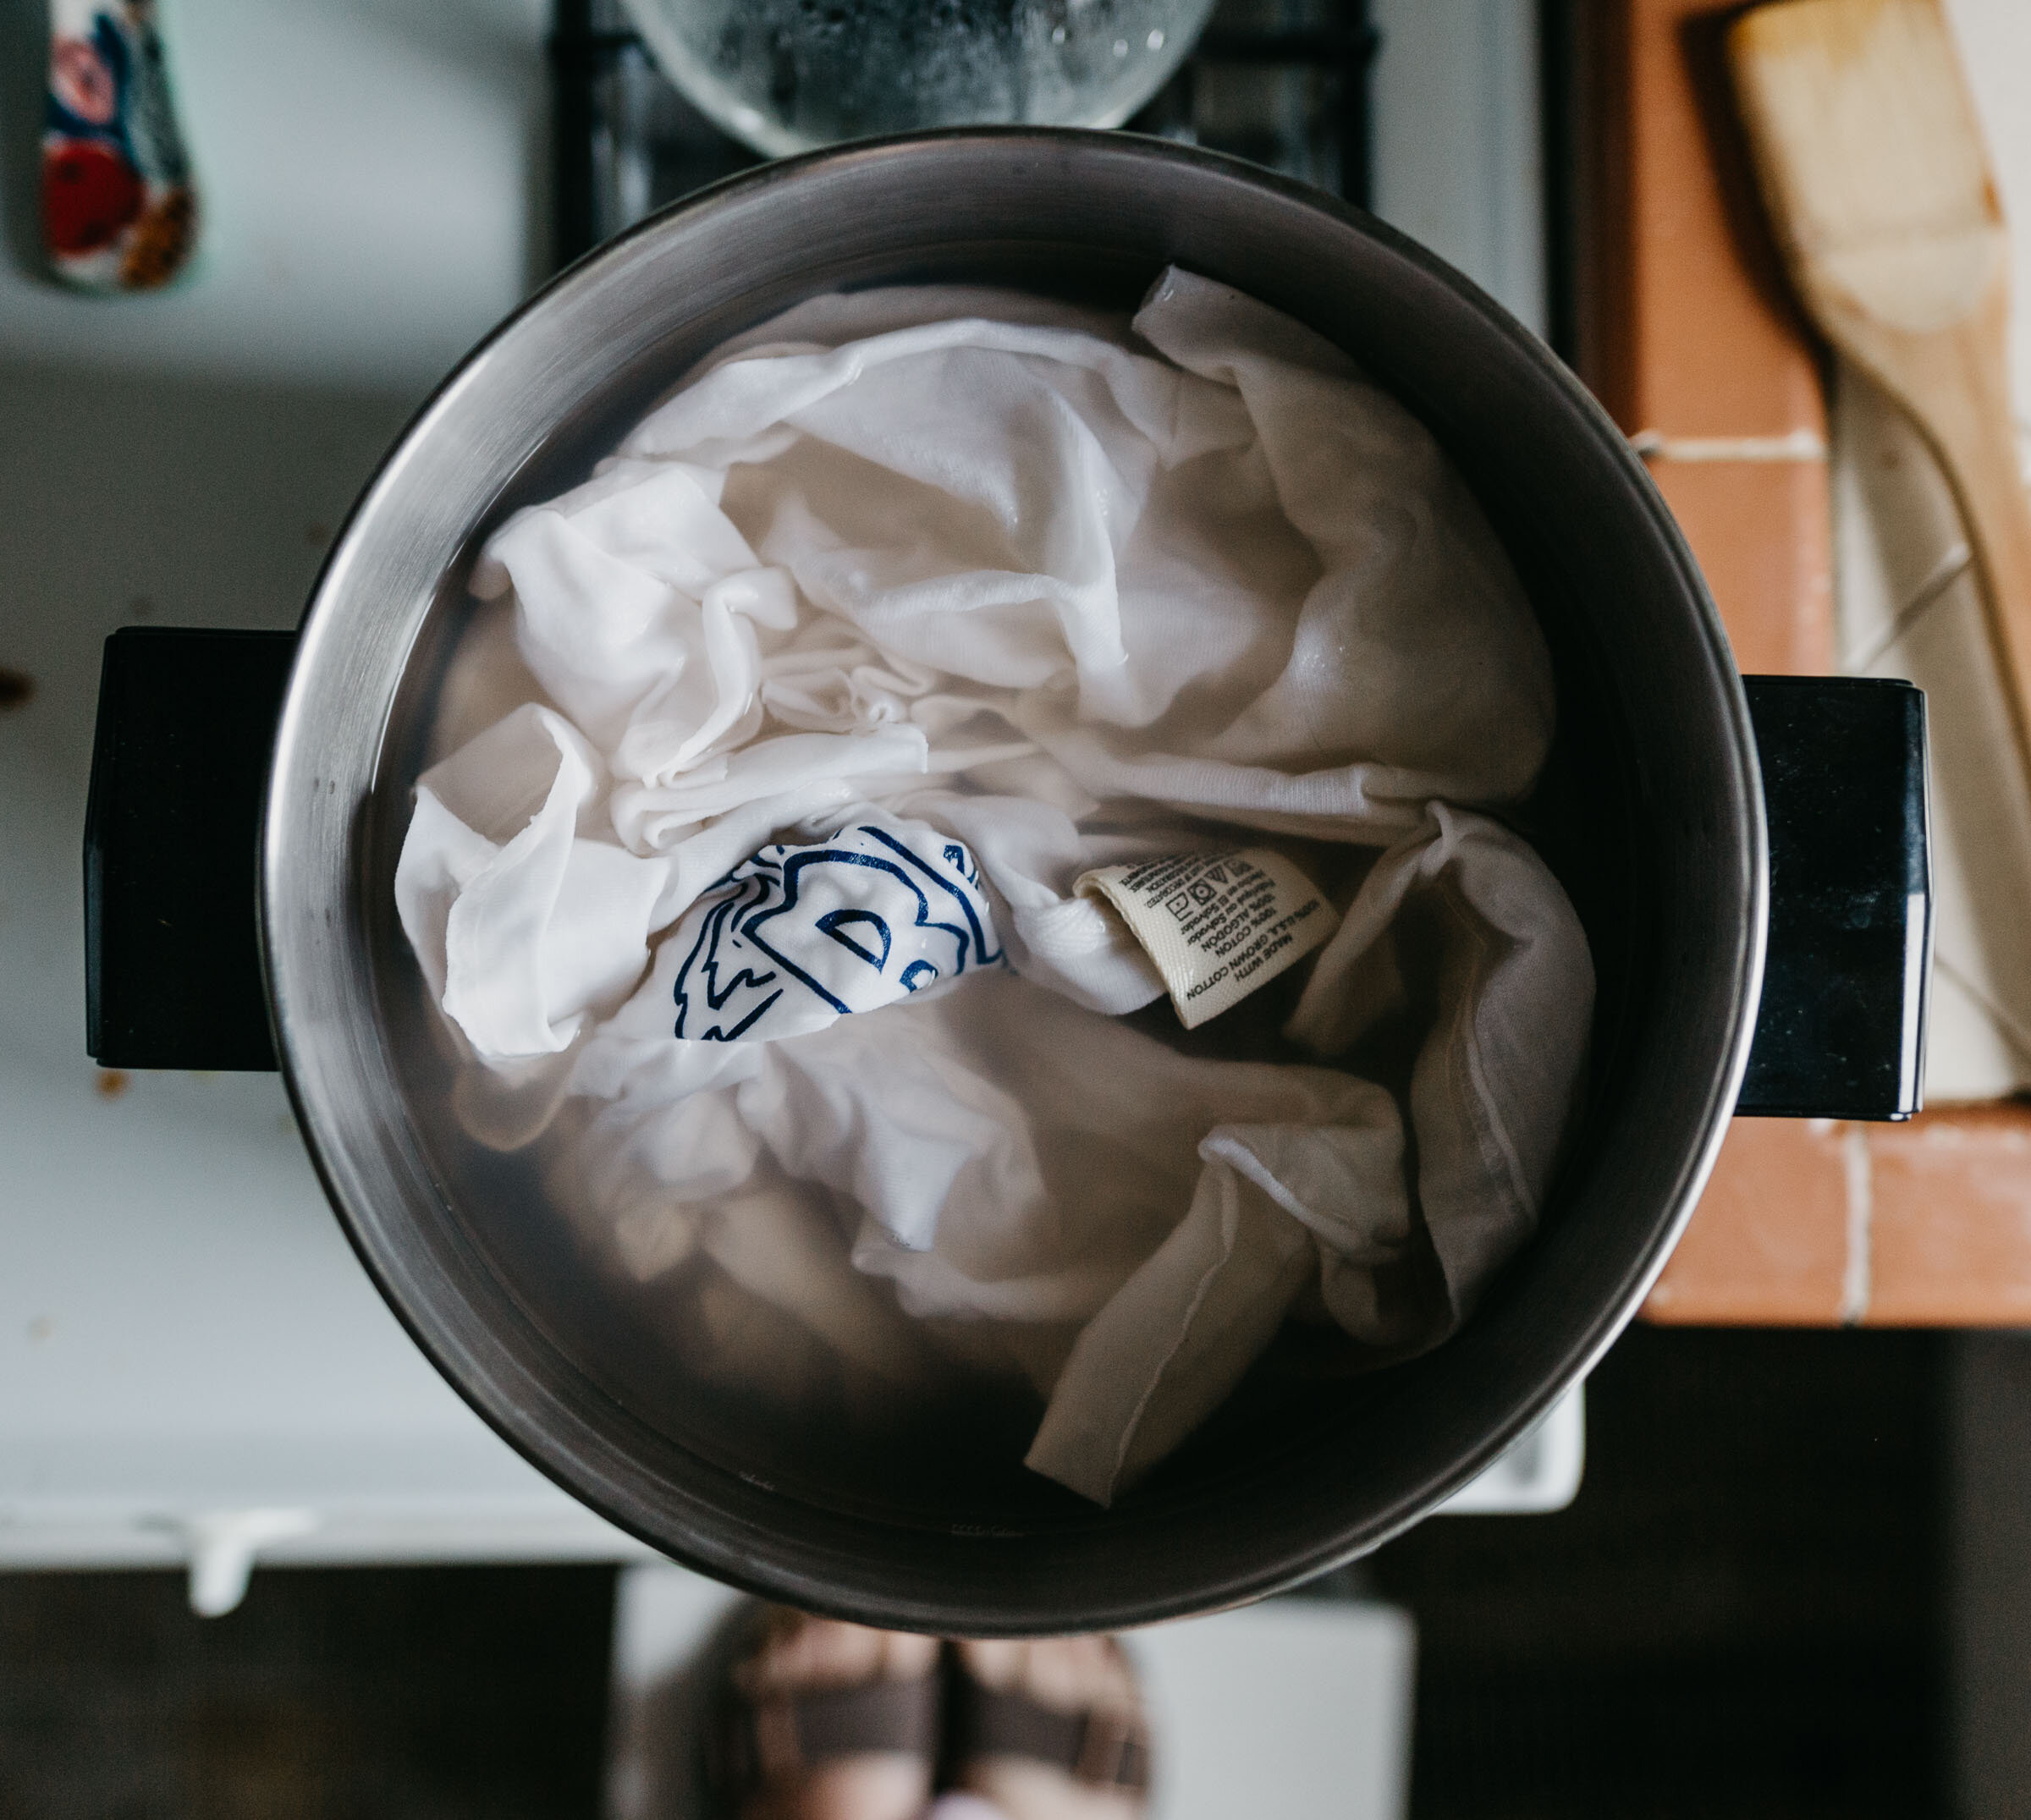
Here’s what I’m throwing into my pot:
1 old white tank top - 100% Cotton
1 white long sleeve shirt - 100% Cotton
1 white t shirt with surf shop logo - 100% ring spun cotton (fancy)
1 brand spankin’ new Thrasher t-shirt Bruno got free with subscription - 100% Cotton
1 30” square white bandana - Organic Cotton
I made a couple of the t-shirts into crop tops by cutting off the bottom, then cut the excess up for more color experiments. It ended up being 571 grams of fabric total. I read a lot of conflicting information on how much soda ash to add, but the general consensus seems to be about 2% of the weight of fabric (for me, this was about 12 grams).
While I was baking my baking soda, I had my fabric soaking in a bucket of regular tap water to throughly wet it. After my homemade soda ash was finished and cooled, I dissolved 12 grams in boiling water and added my mixture to a full pot of water with about a tablespoon of Synthrapol washing detergent. Then I added my fabric to boil, followed by a simmer for 2 hours. I just left this whole mixture in the pot overnight to cool down, and in the morning I ran it through my washing machine to rinse. The excess water left in my scour pot was murky and BROWN when I pulled my fabric out (and these were supposedly clean shirts!) So I’m understanding why the scour was necessary. Now my fabric is ready to be mordanted!

Some resources I used for the scouring process: Dream Bird Studio & Botanical Colors
Step 2: Mordant
A mordant is basically a primer for natural dyes — it’s a soaking process with a metal salt like aluminum. The metal salt acts as a bridge between your fiber and the dye, creating this insoluble bond that ensures the most durable and long lasting colors. It is especially important to mordant your fabric before using any natural dyes or your fabric may fade in sunlight or when you wash it.
When my scoured clothes finished their rinse cycle, I loaded them in a 5 gallon bucket for the mordant. This process can also be done over heat in a few hours, but my pot seemed just a little too small during the scouring process… I chose to let them soak at room temp for 24 hours.
I mordant I am using is Aluminum Acetate which seems to be a favorite among dyers. It is recommended to use 5-10% of the weight of fiber (WOF) in modant — in my case, this is 57 grams. Here’s the process:
Weigh out 57 grams (or 10% WOF) of alum & add to approx. 1 cup of boiling water. Stir to dissolve.
Fill a 5gall bucket with hot water from the tap (exact volume doesn’t really matter here, but your fabric should have enough room to move freely when stirred). Add your dissolved alum water and give it a quick stir.
Add your fiber to the bucket and stir continually for the first 5 minutes (harder than you think!). Let it soak for 6-24 hours.
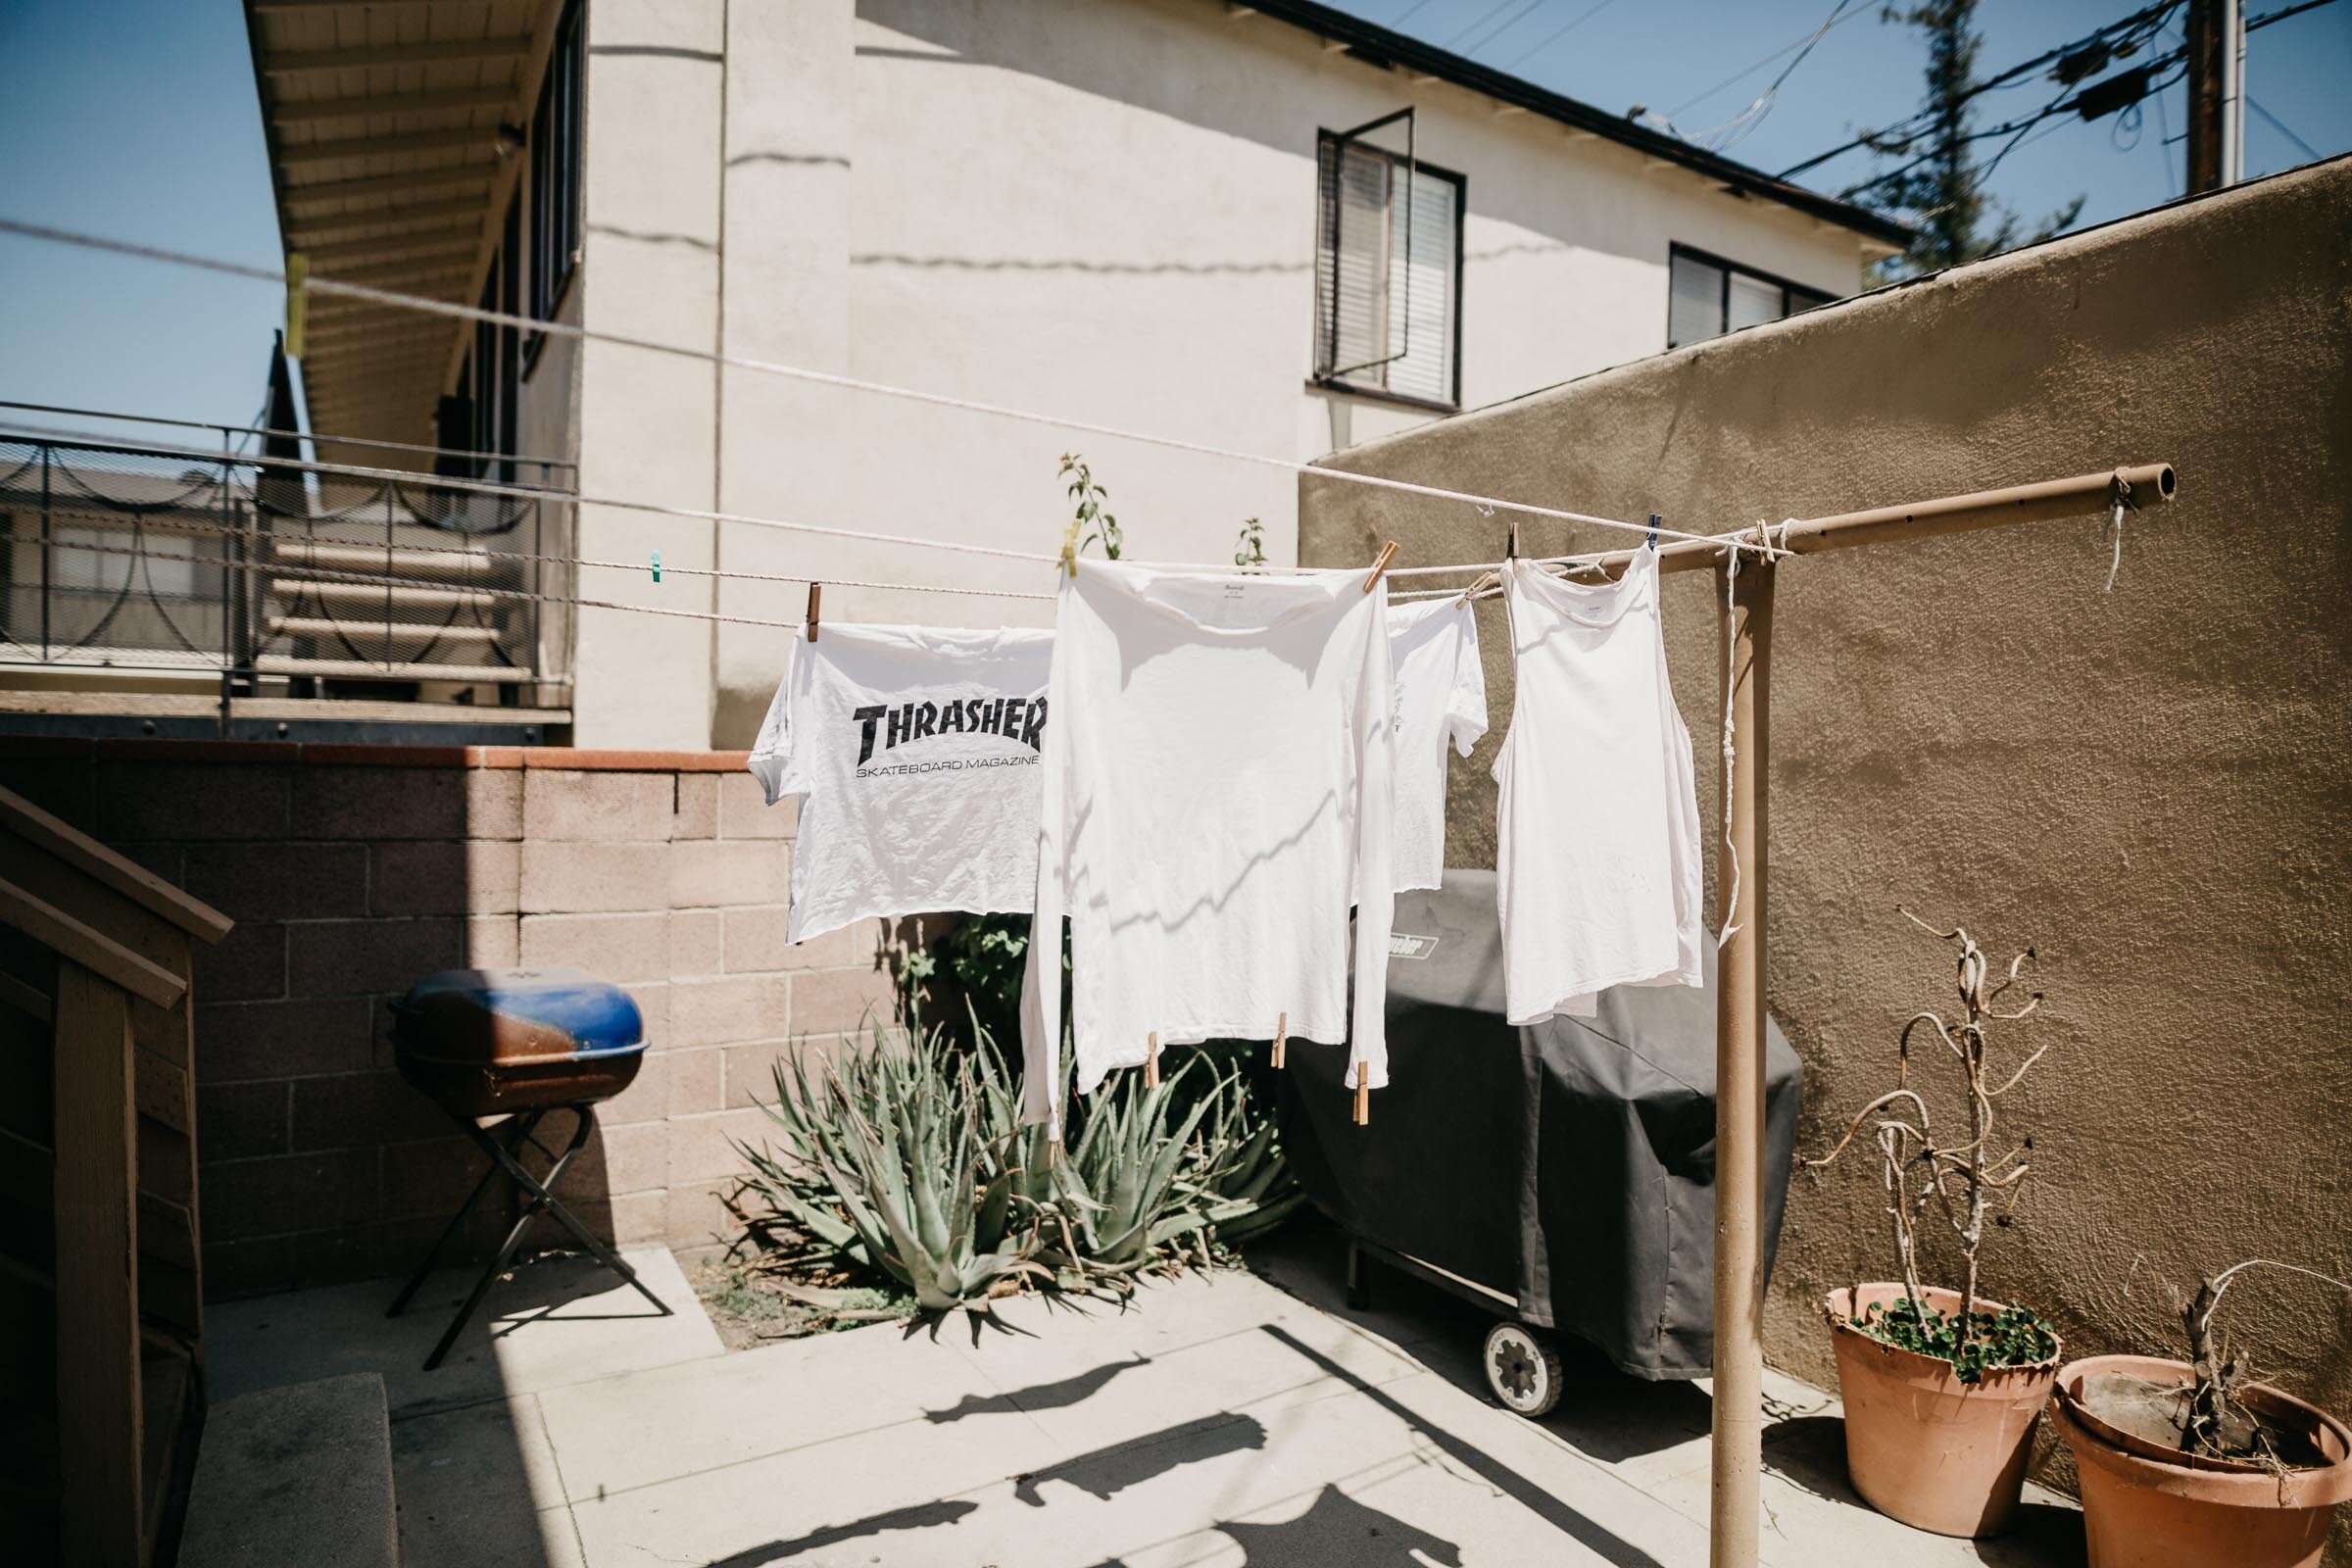
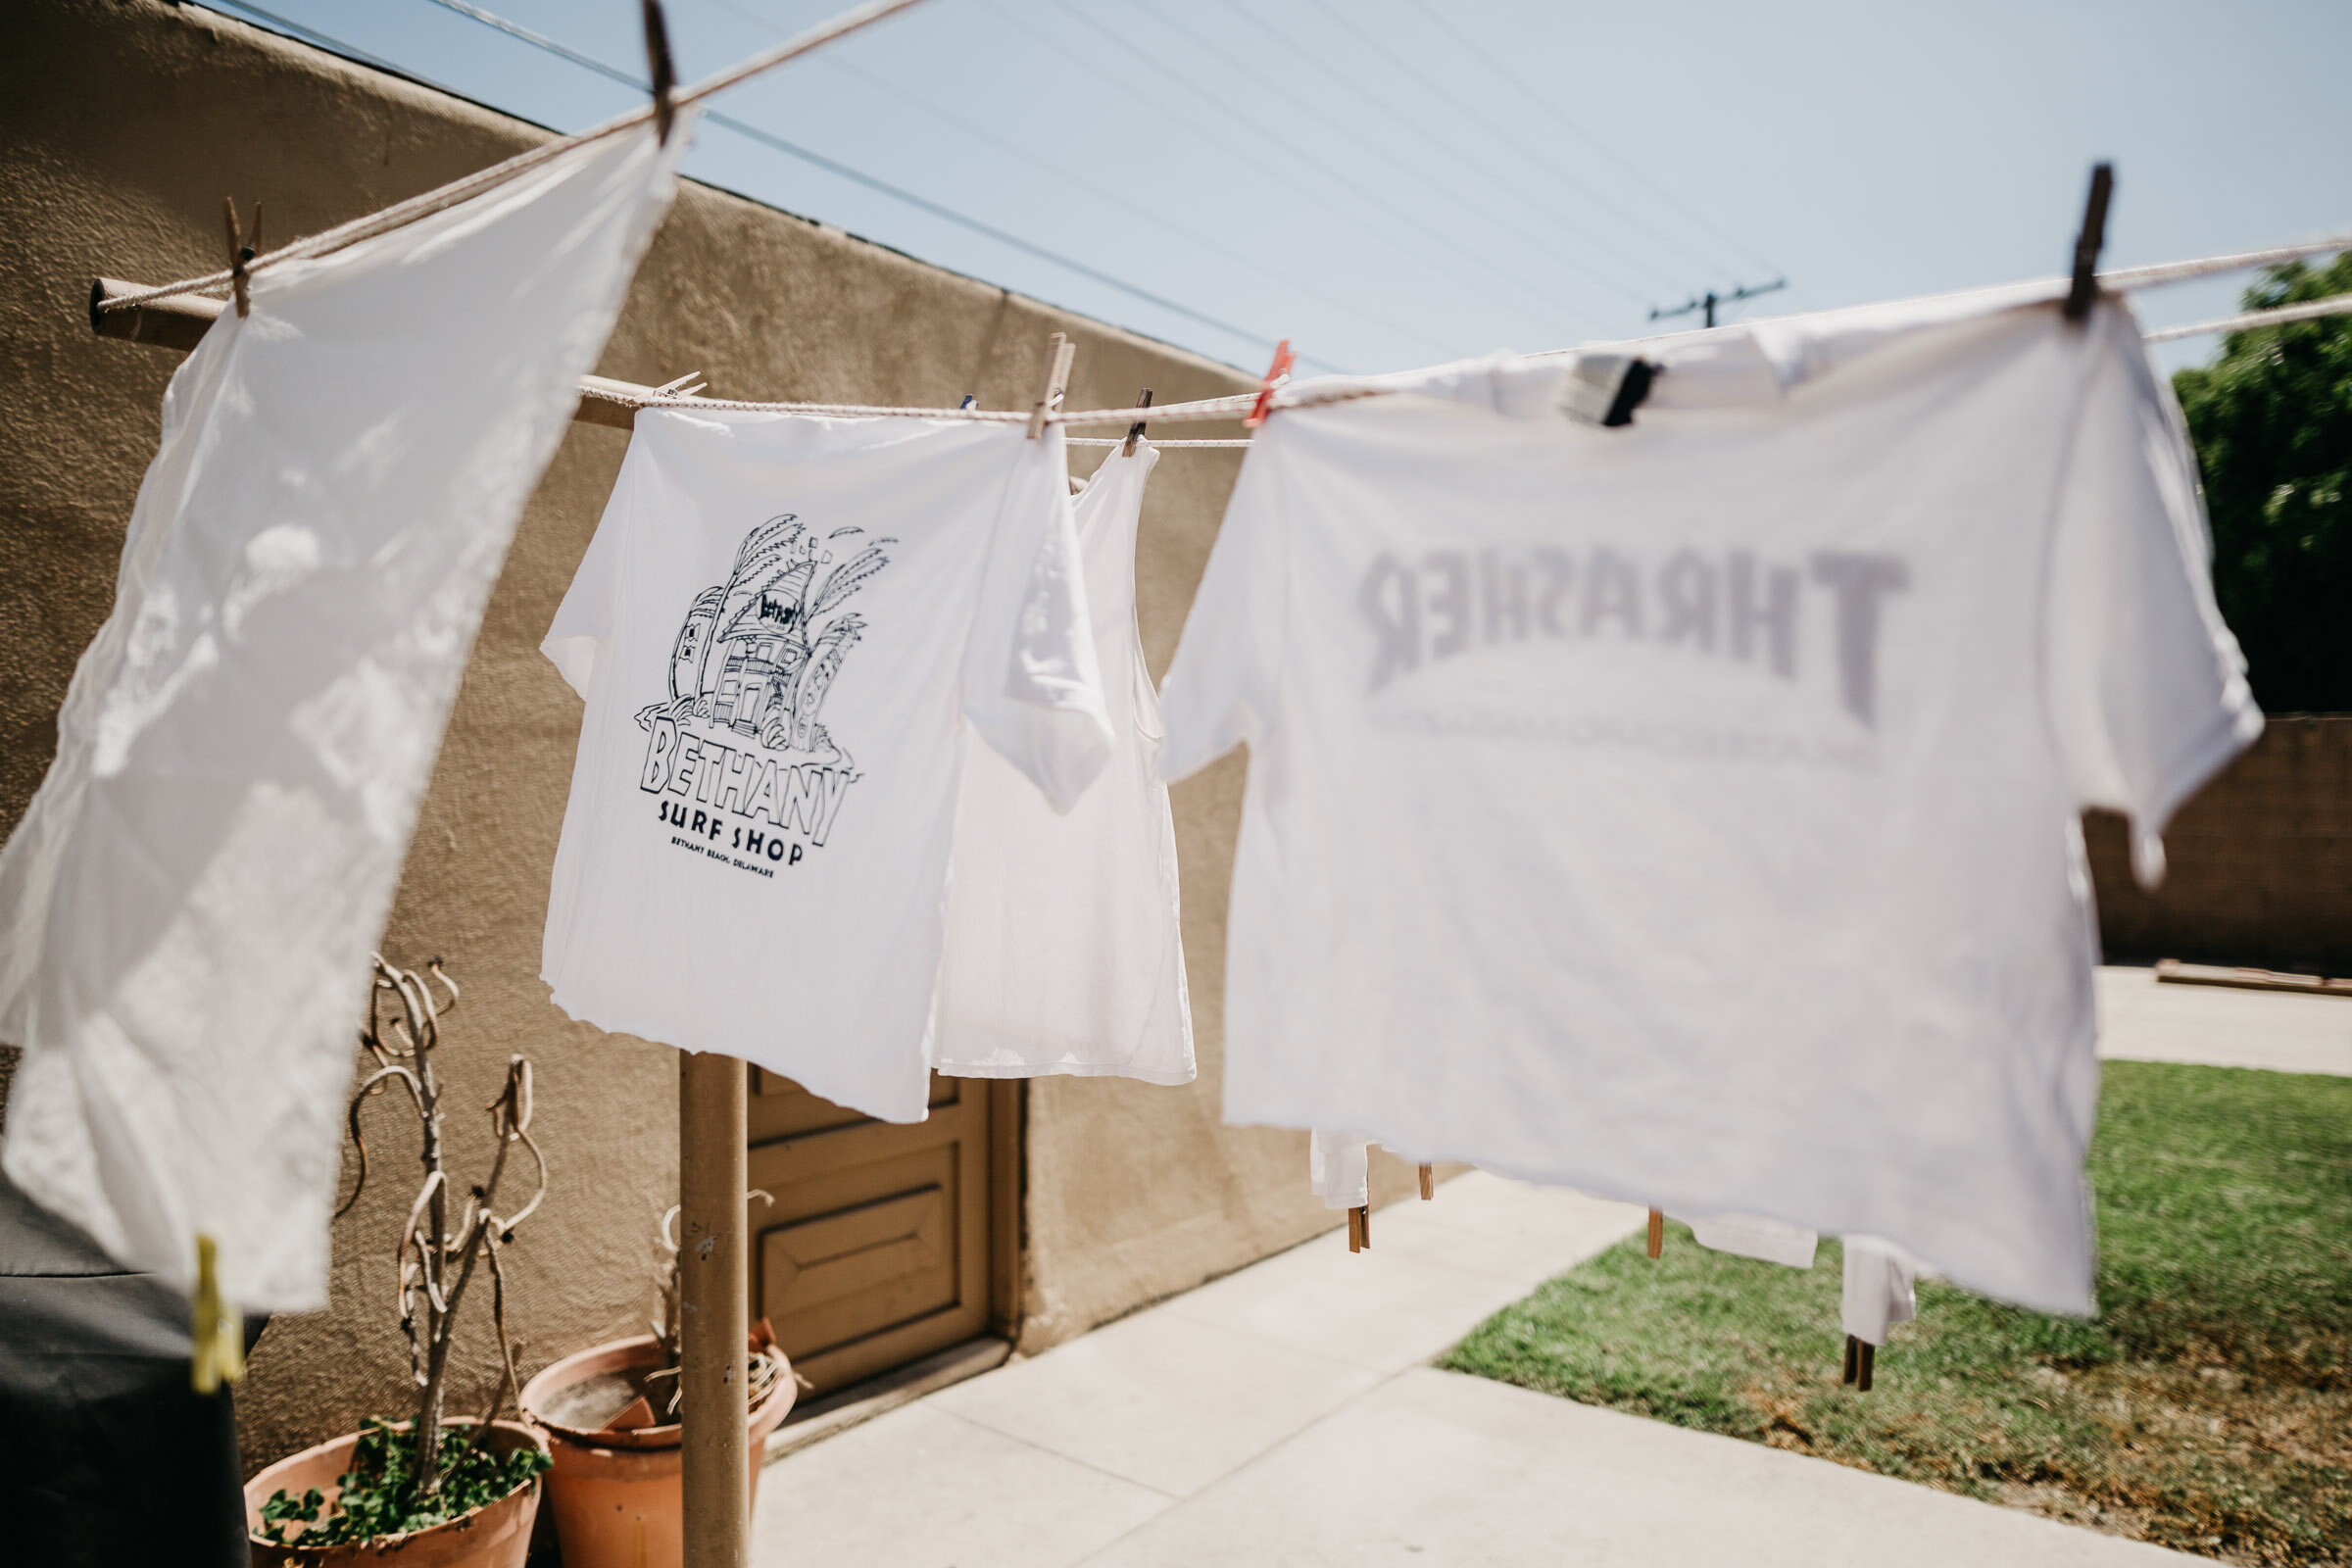
Put on some gloves and retrieve your fabric from the bucket. Wring it out well but don’t rinse it yet. Hang it to dry for at least one day, keeping the fabric as taught as possible with minimal wrinkles. Alum bonds even further with a day or two to dry and cure to the fabric (brighter colors — yay!)
It’s also cool to note that once your fabric is mordanted, you’re set forever. That’s why I’m throwing all my fabric in at the same time, I can store some pieces and dye them later.
You can also save and reuse your mordant water. Just add back half as much alum as needed for each new mordanting session.
Step 3: Bundle Dyeing

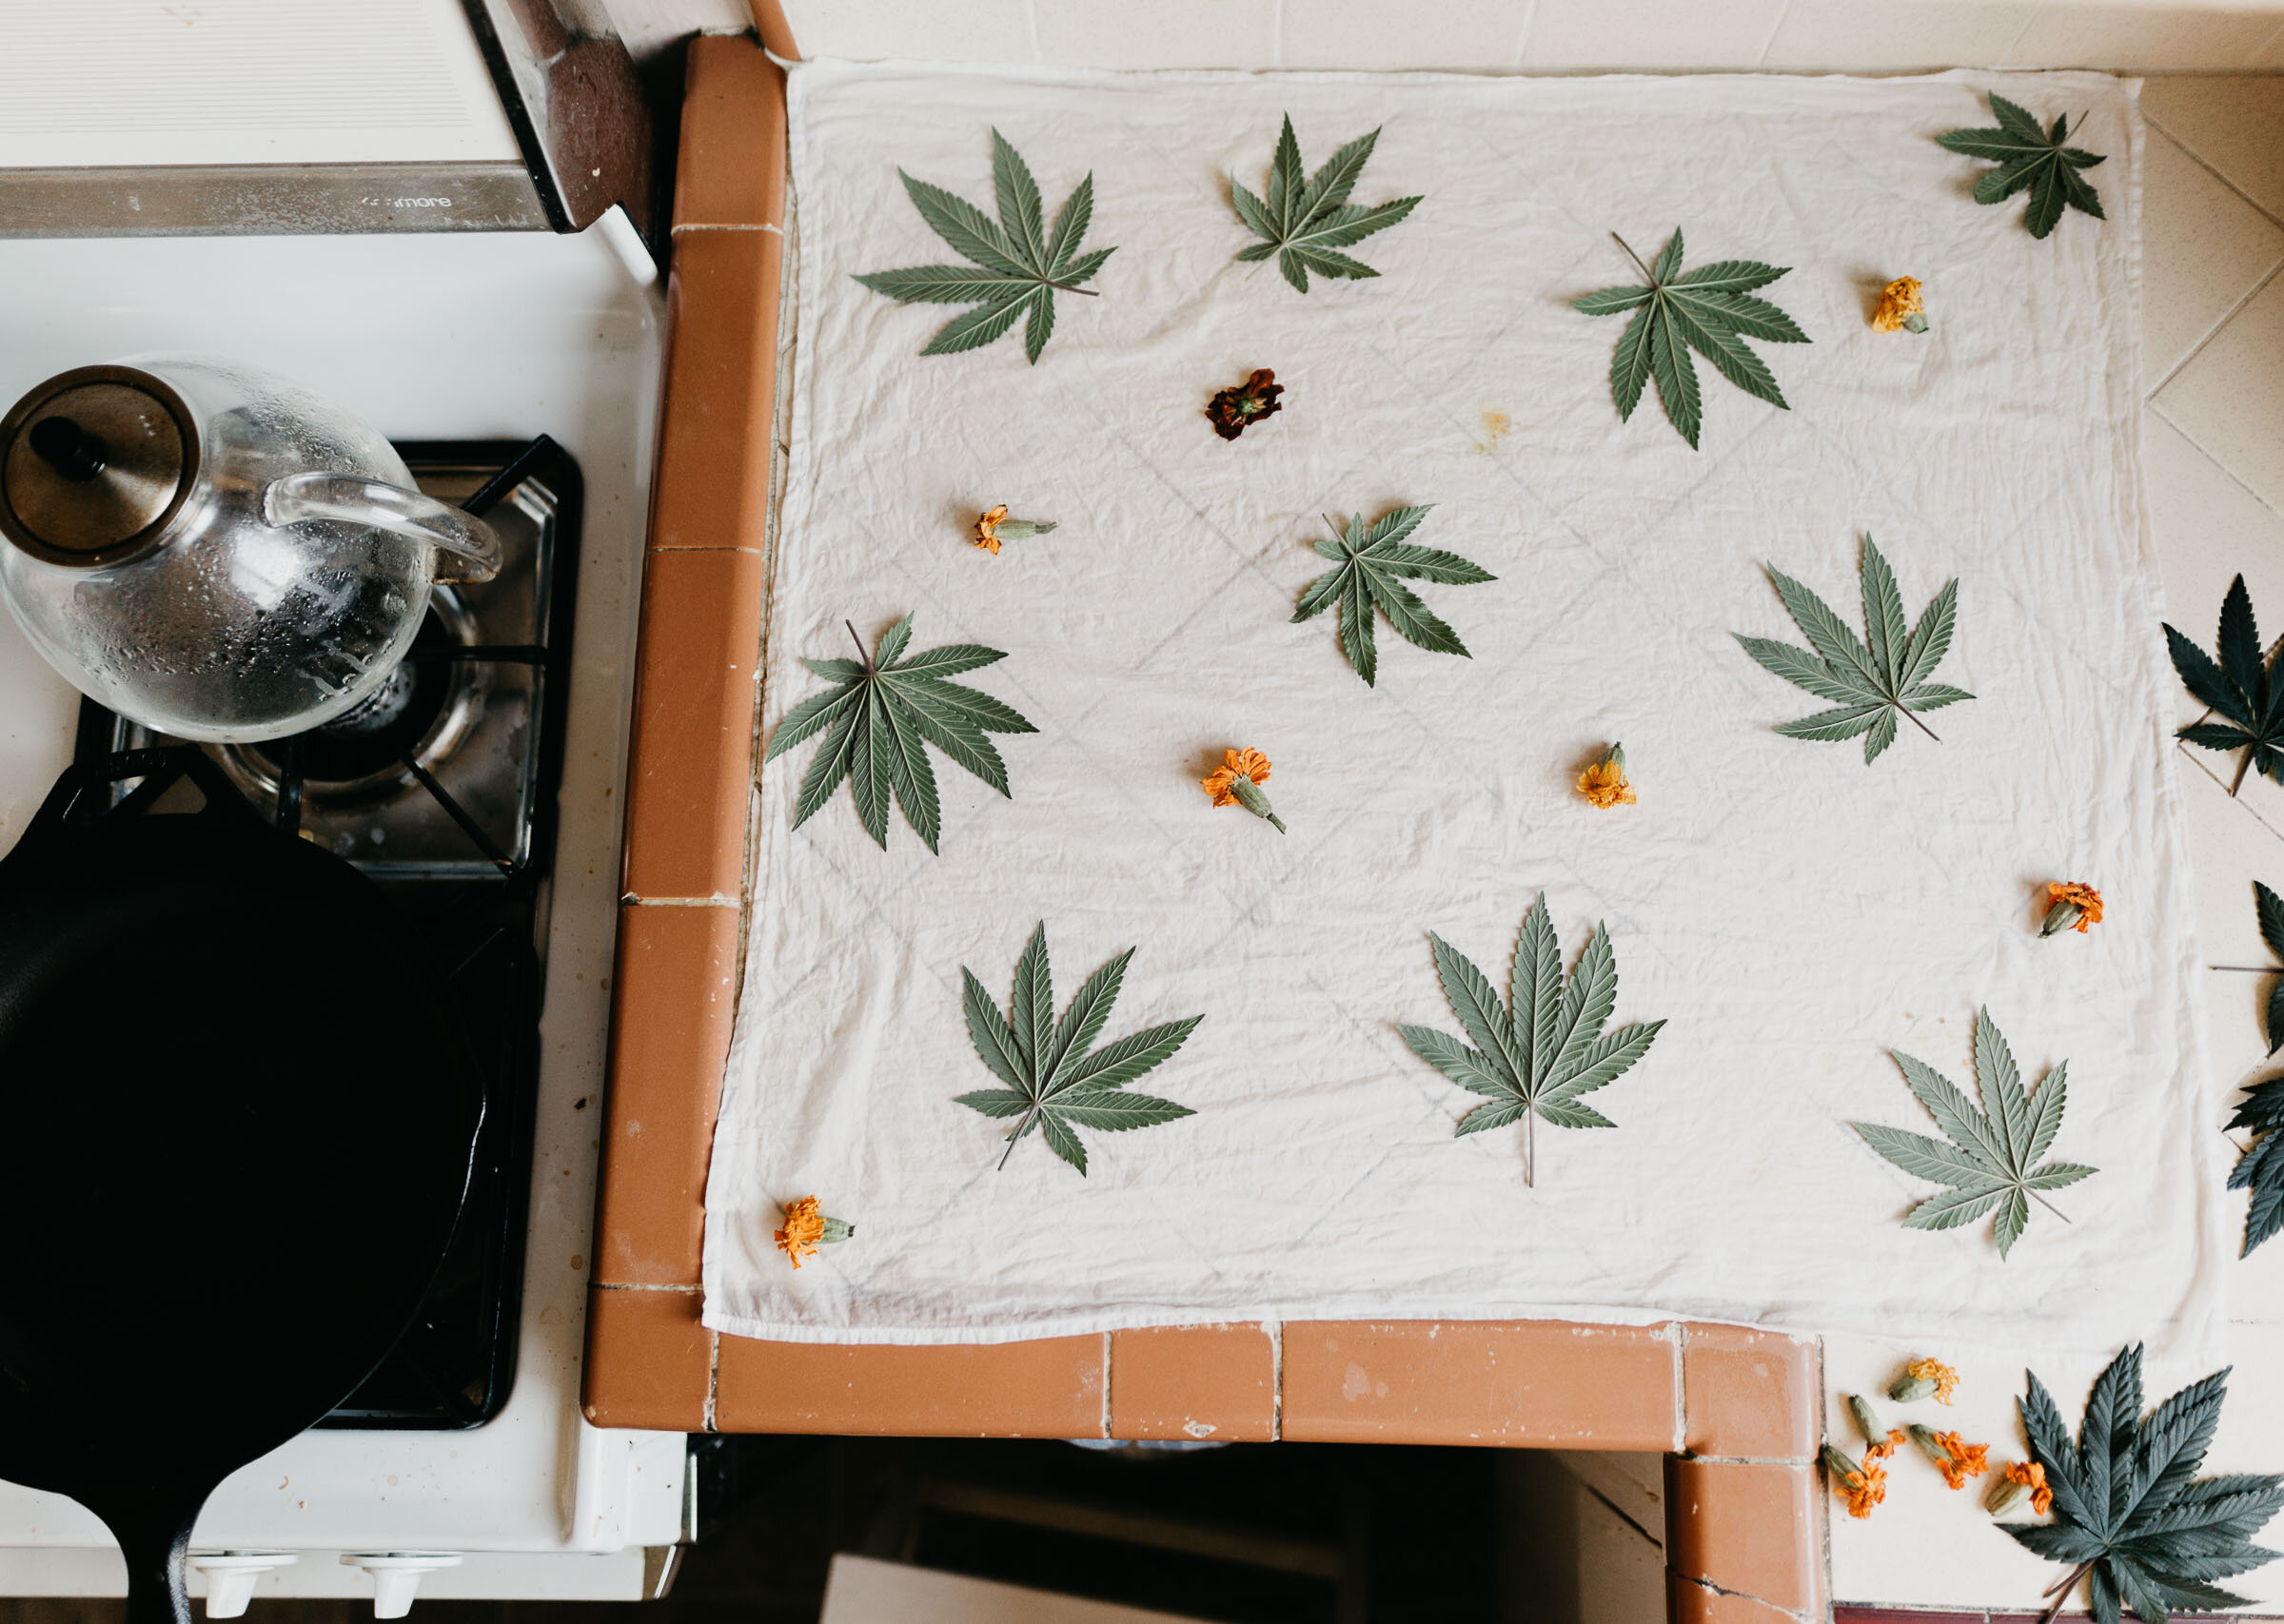
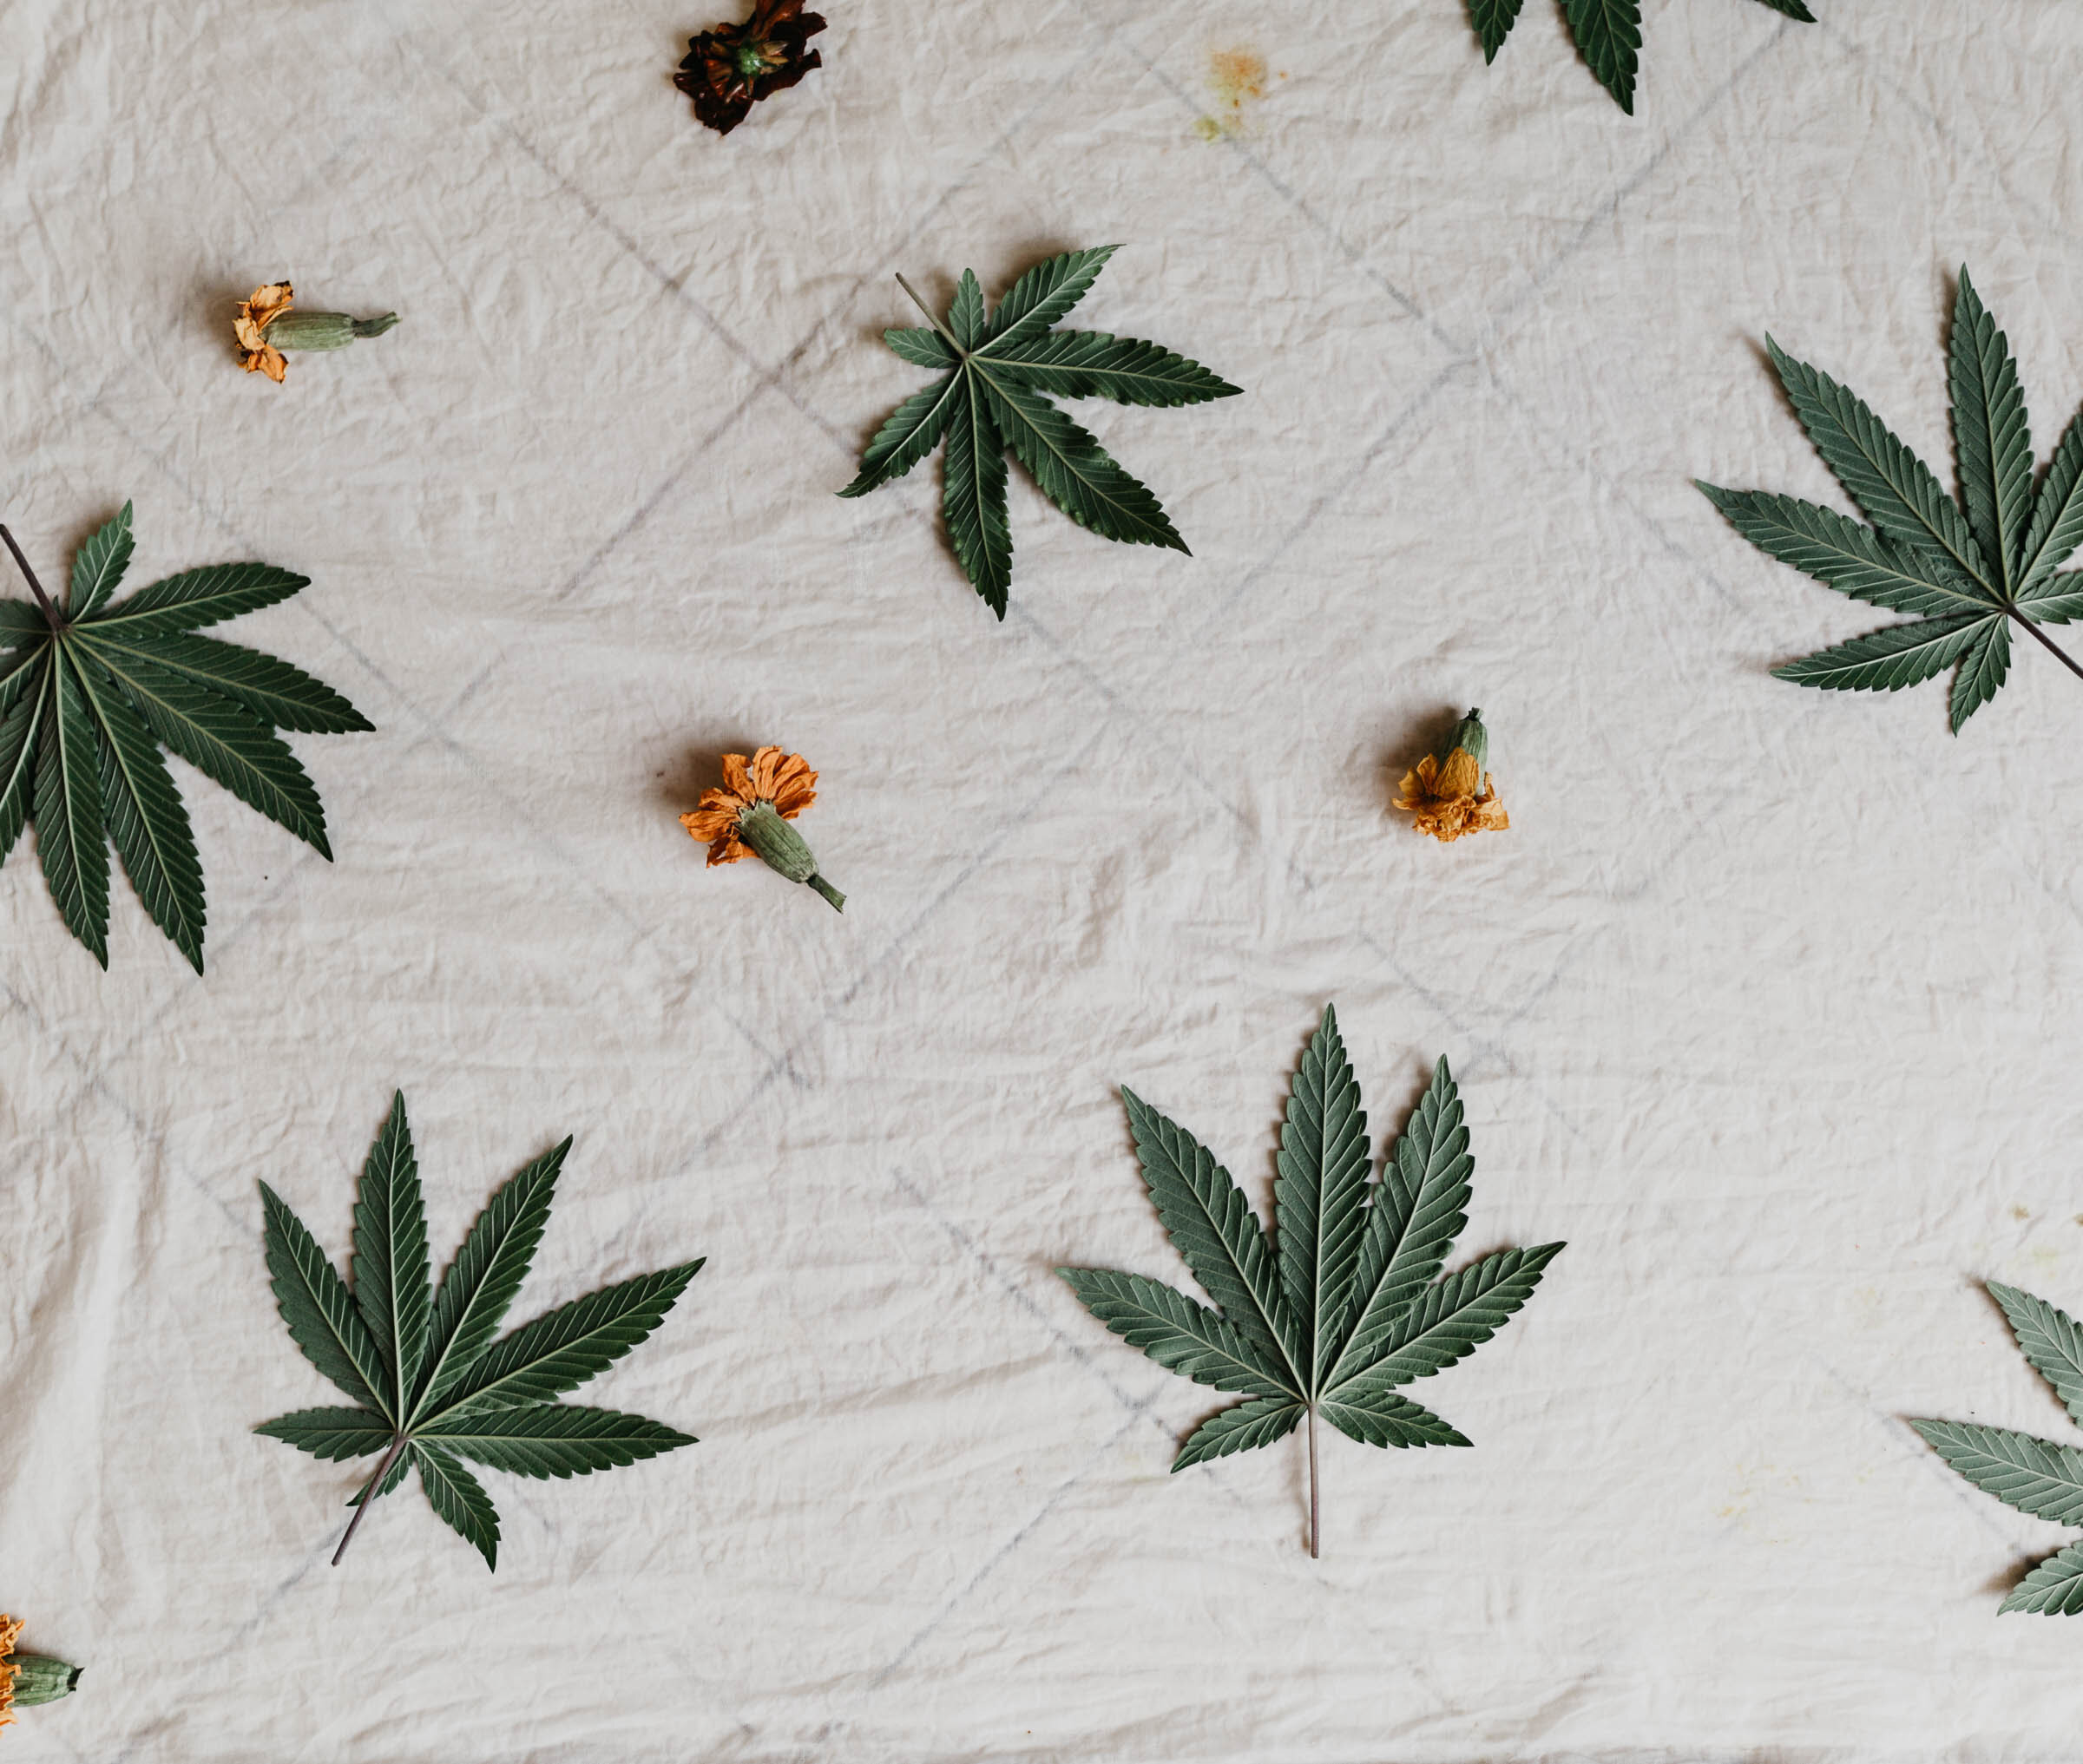
Before I start mushing up all my dyestuffs, I wanted to try my hand at bundle dyeing with the cannabis leaves my neighbor brought me. The goal here is to transfer the shape and color of the leaves onto my fabric with heat and steam. Here’s the process:
Pre-wet your mordanted fabric and wring it out well so it’s damp but not dripping. Open up your fabric and lay it on a clean, flat surface.
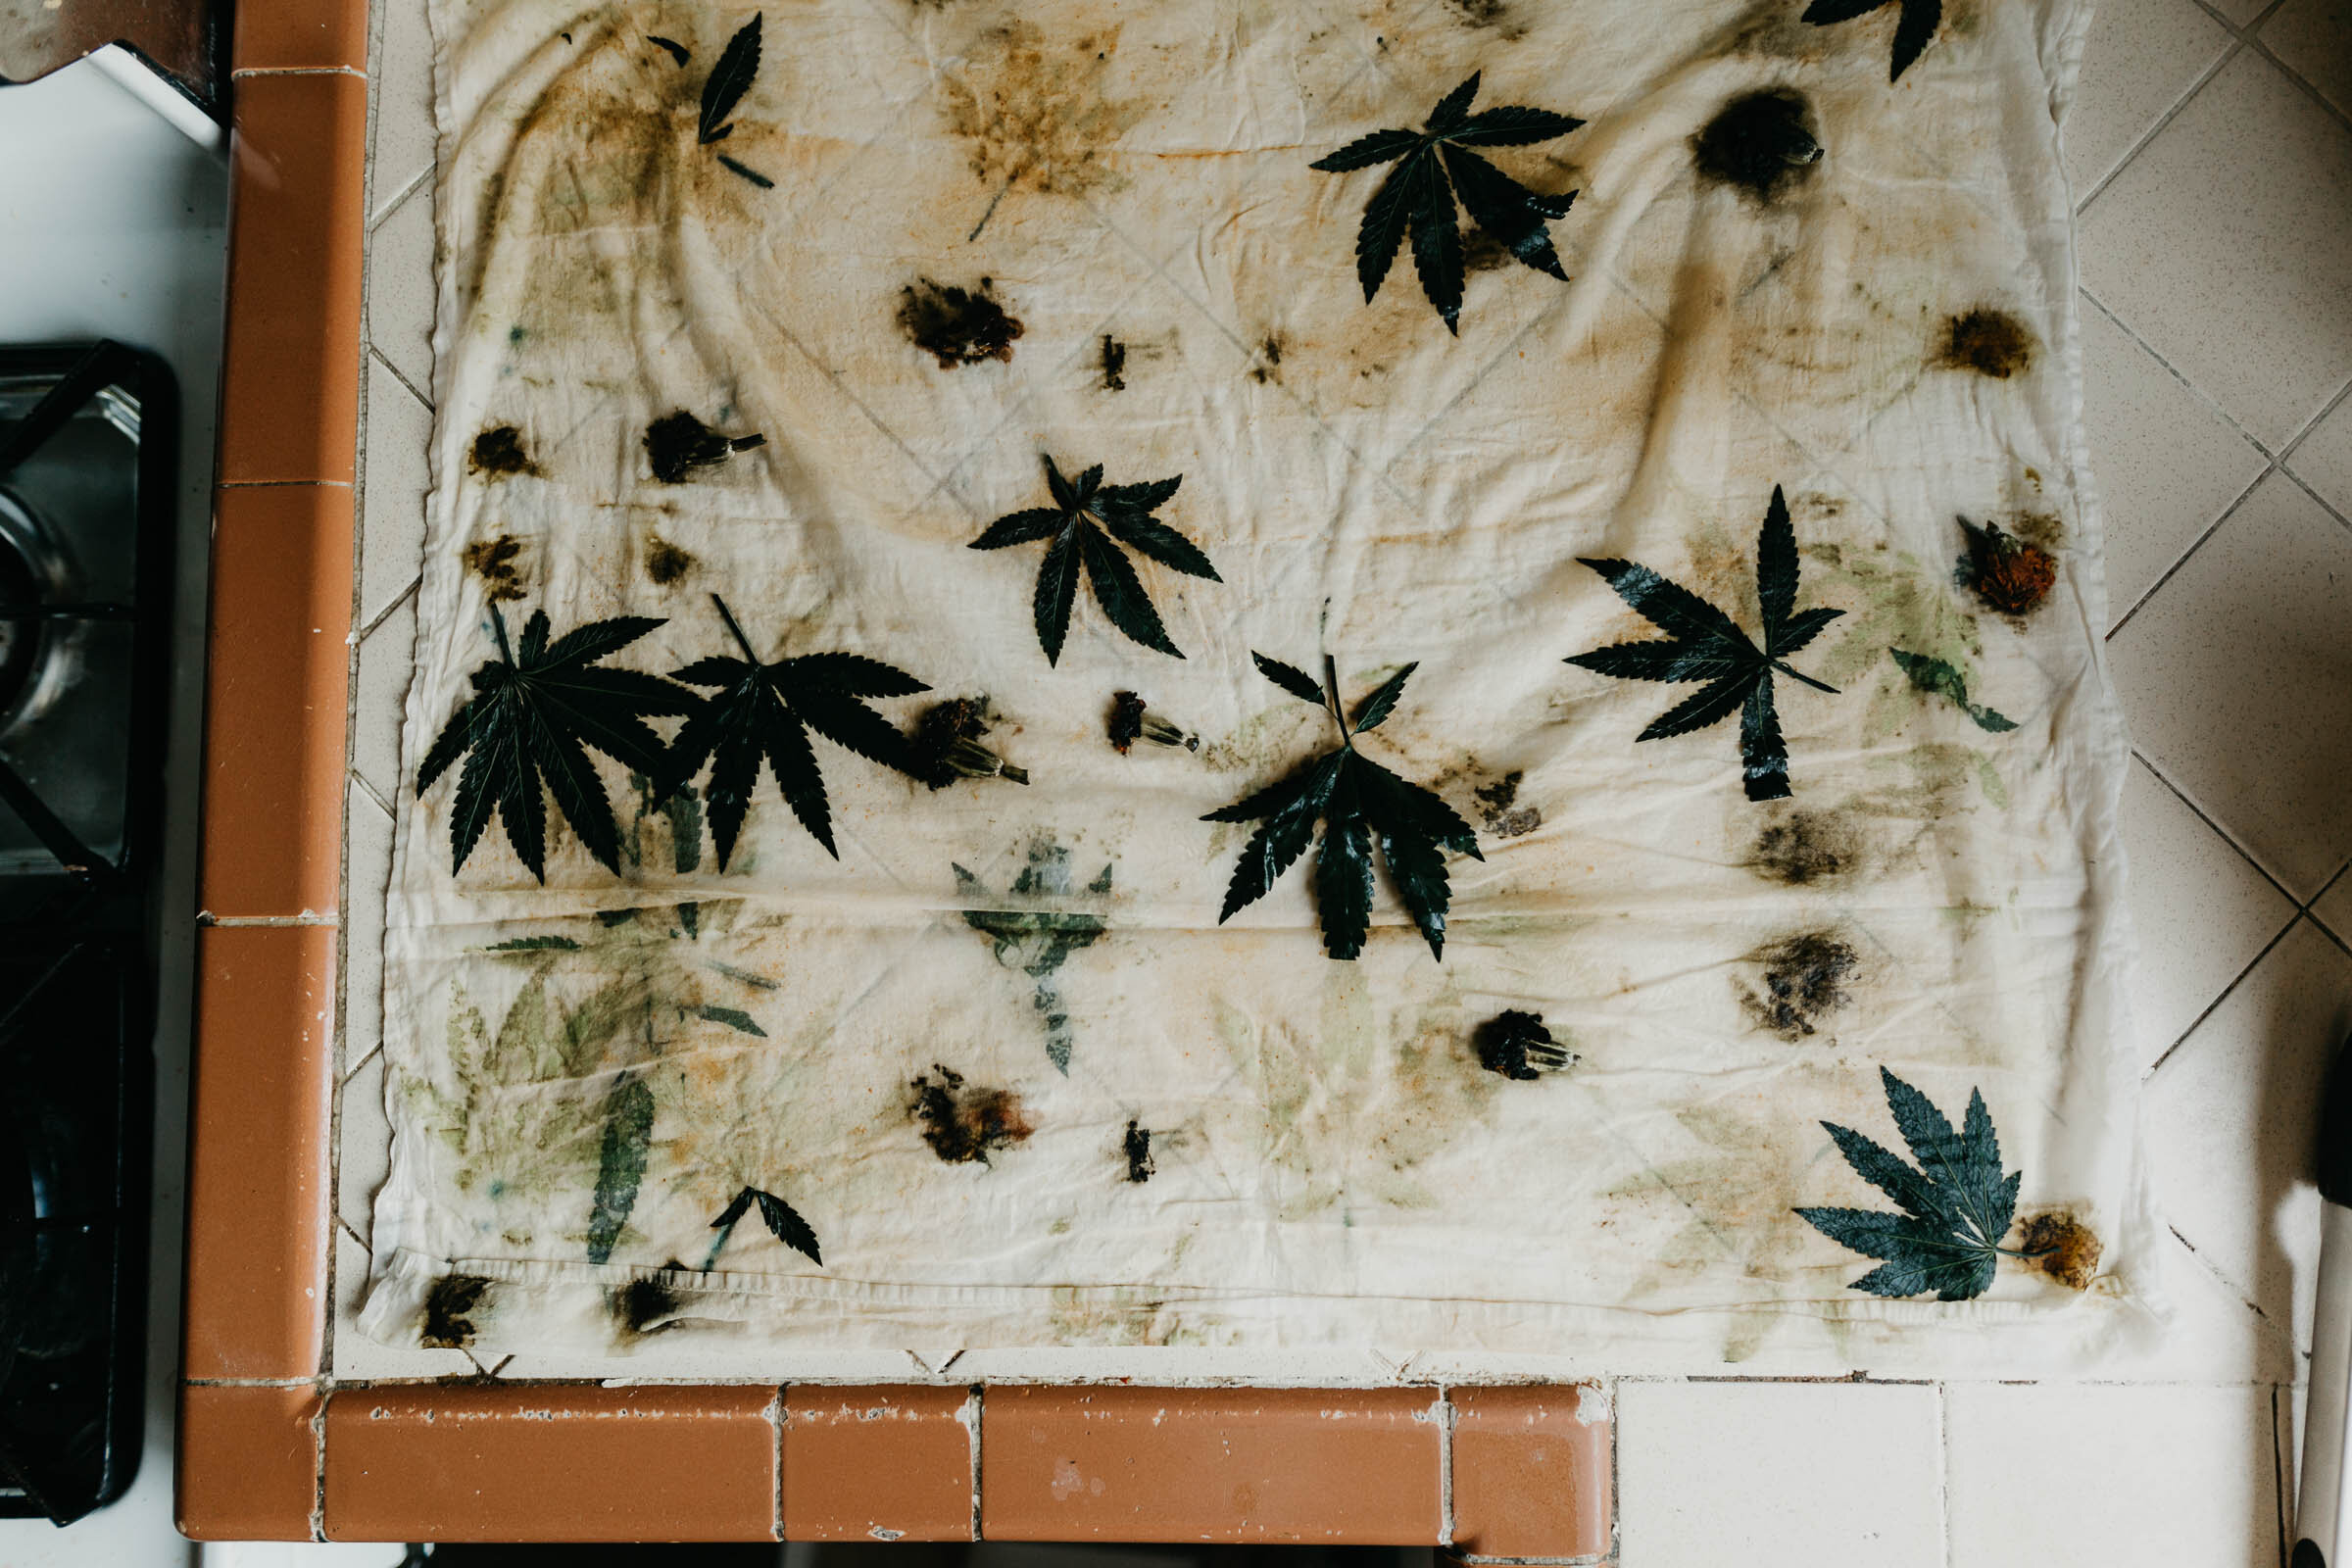
Create a composition on the fabric with your flowers and leaves. The denser the fabric is covered with plants, the more solid your pattern will be.
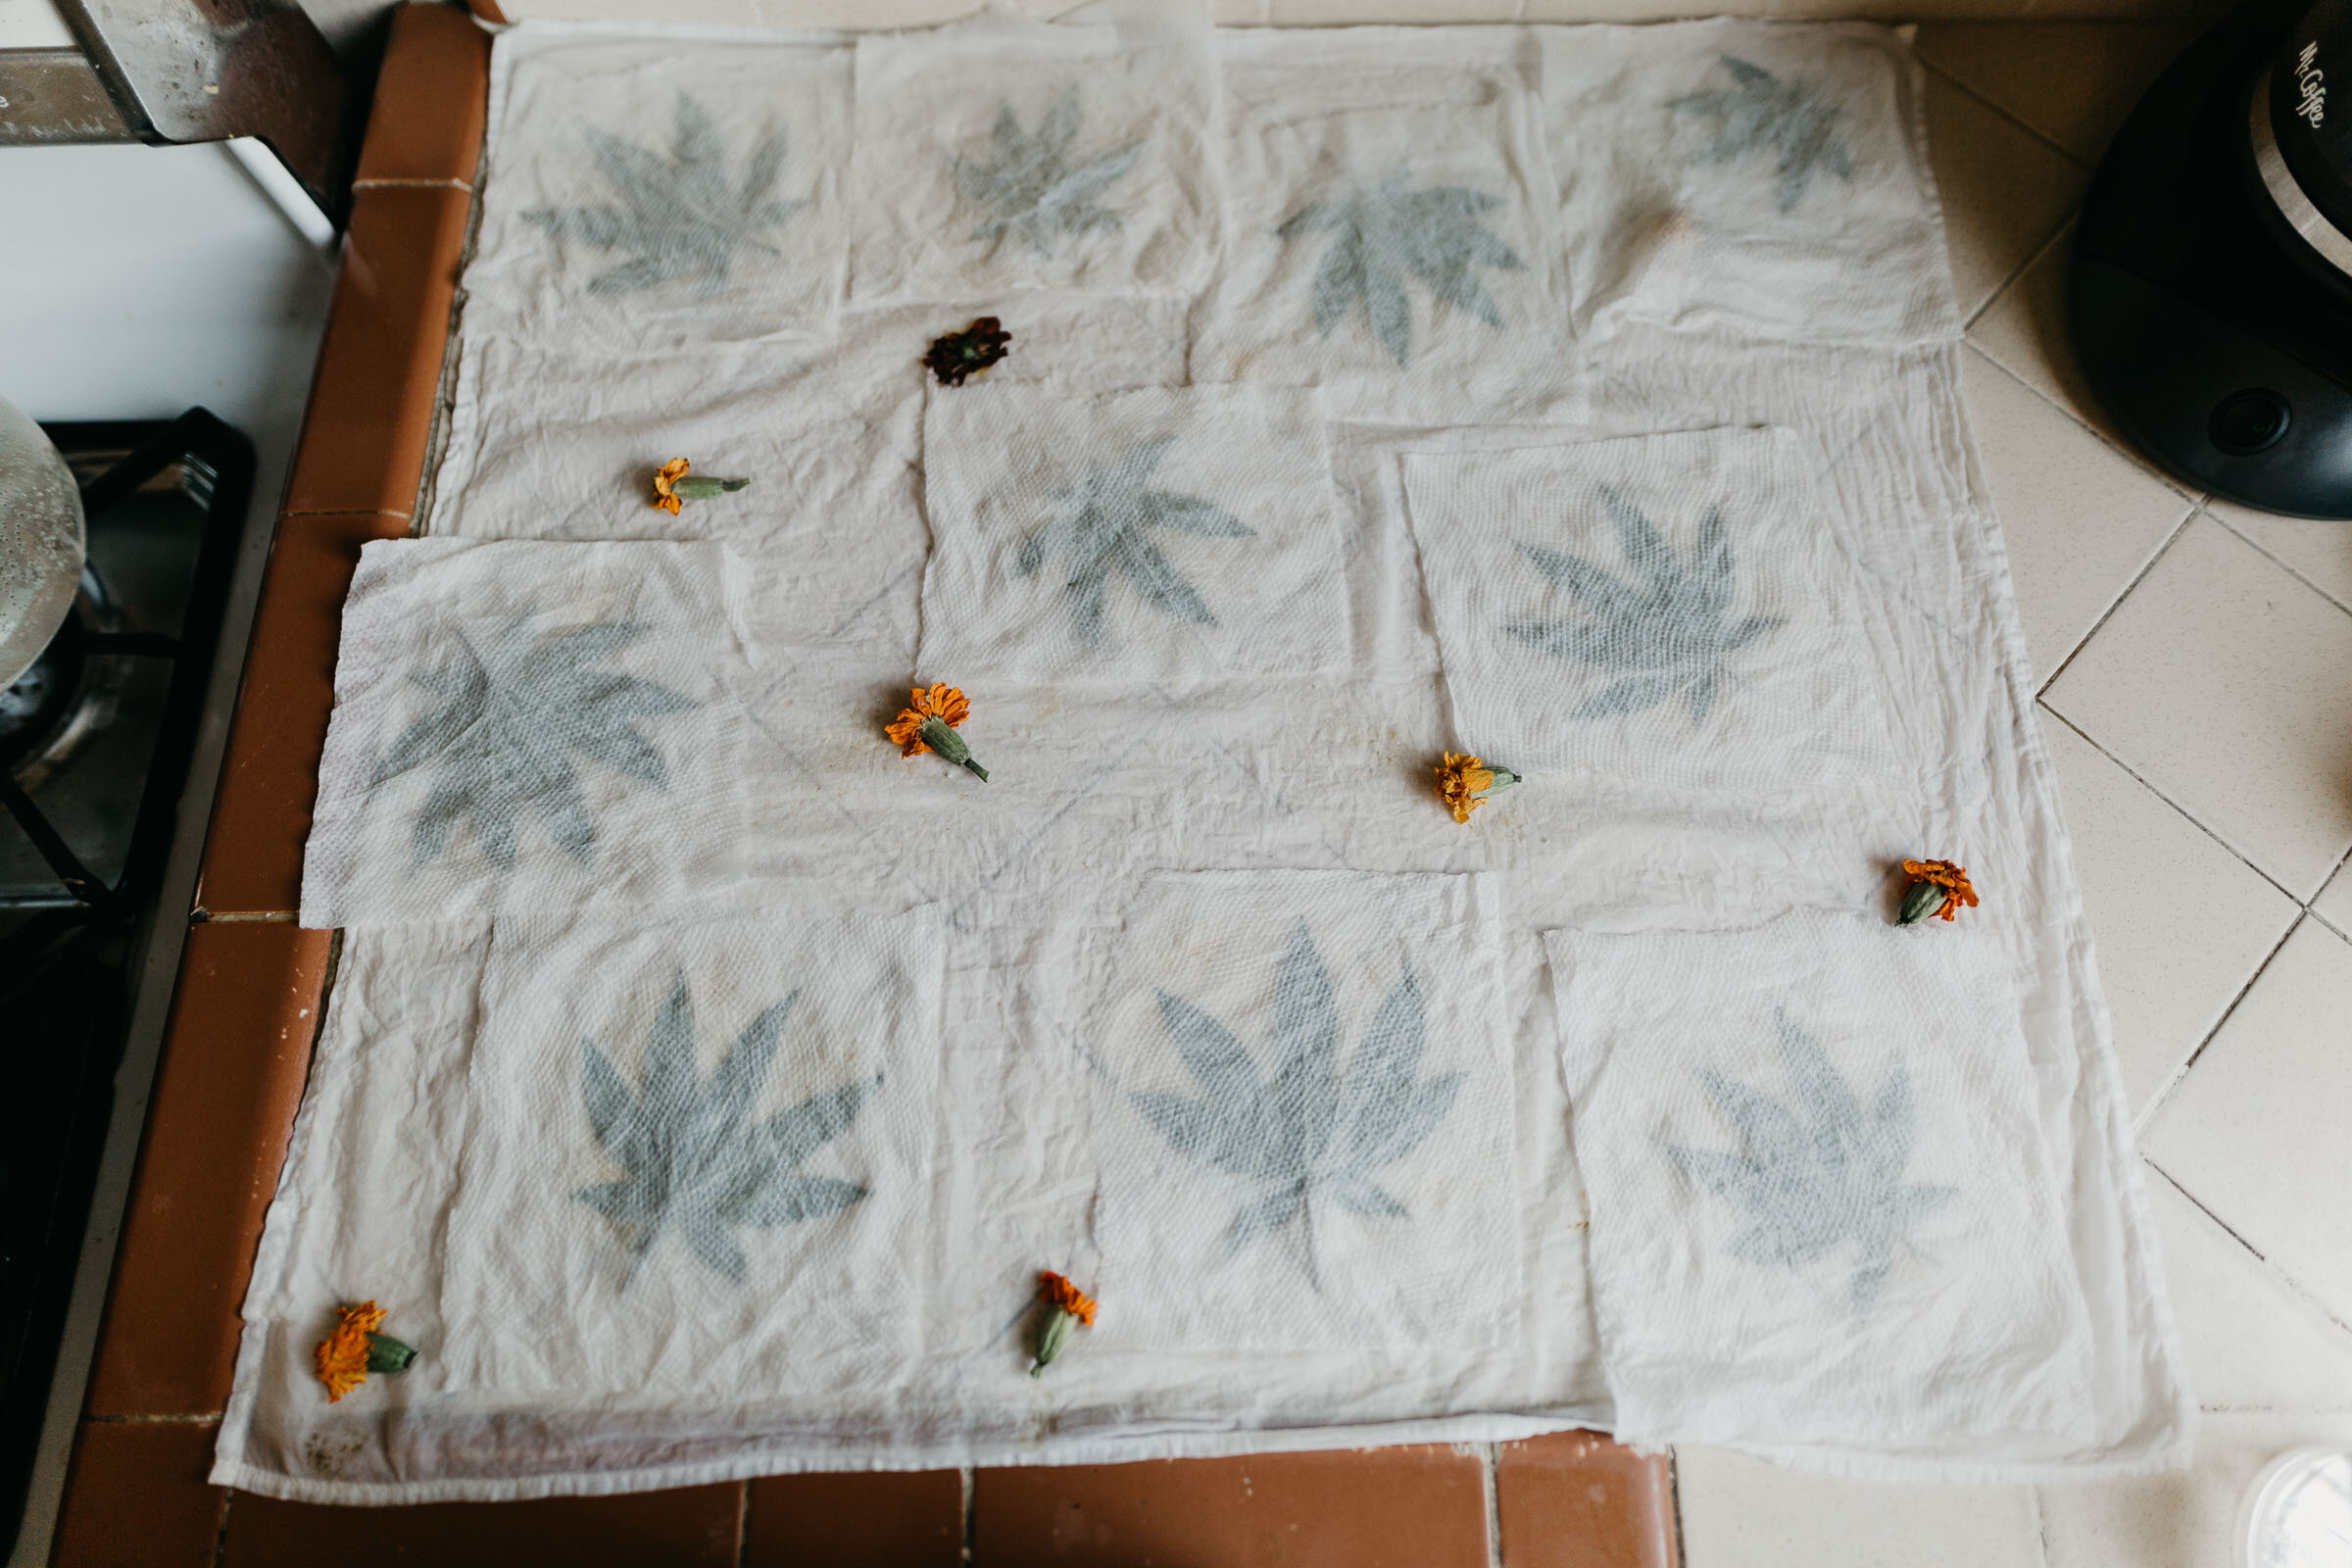
Now to roll my fabric. If I was only trying to transfer the color, I could bind it up in a cinnamon bun shape — but of course I set myself up for a weird challenge. I went through a lot of trial and error during this process trying to apply steam while keeping my composition flat (of course I don’t have any helpful household items like an iron or steamer). Eventually, I settled for a loose fold, keeping the leaves as flat as possible and trying not to overlap too many. I folded until I had a rectangle just small enough to fit inside my biggest pot.
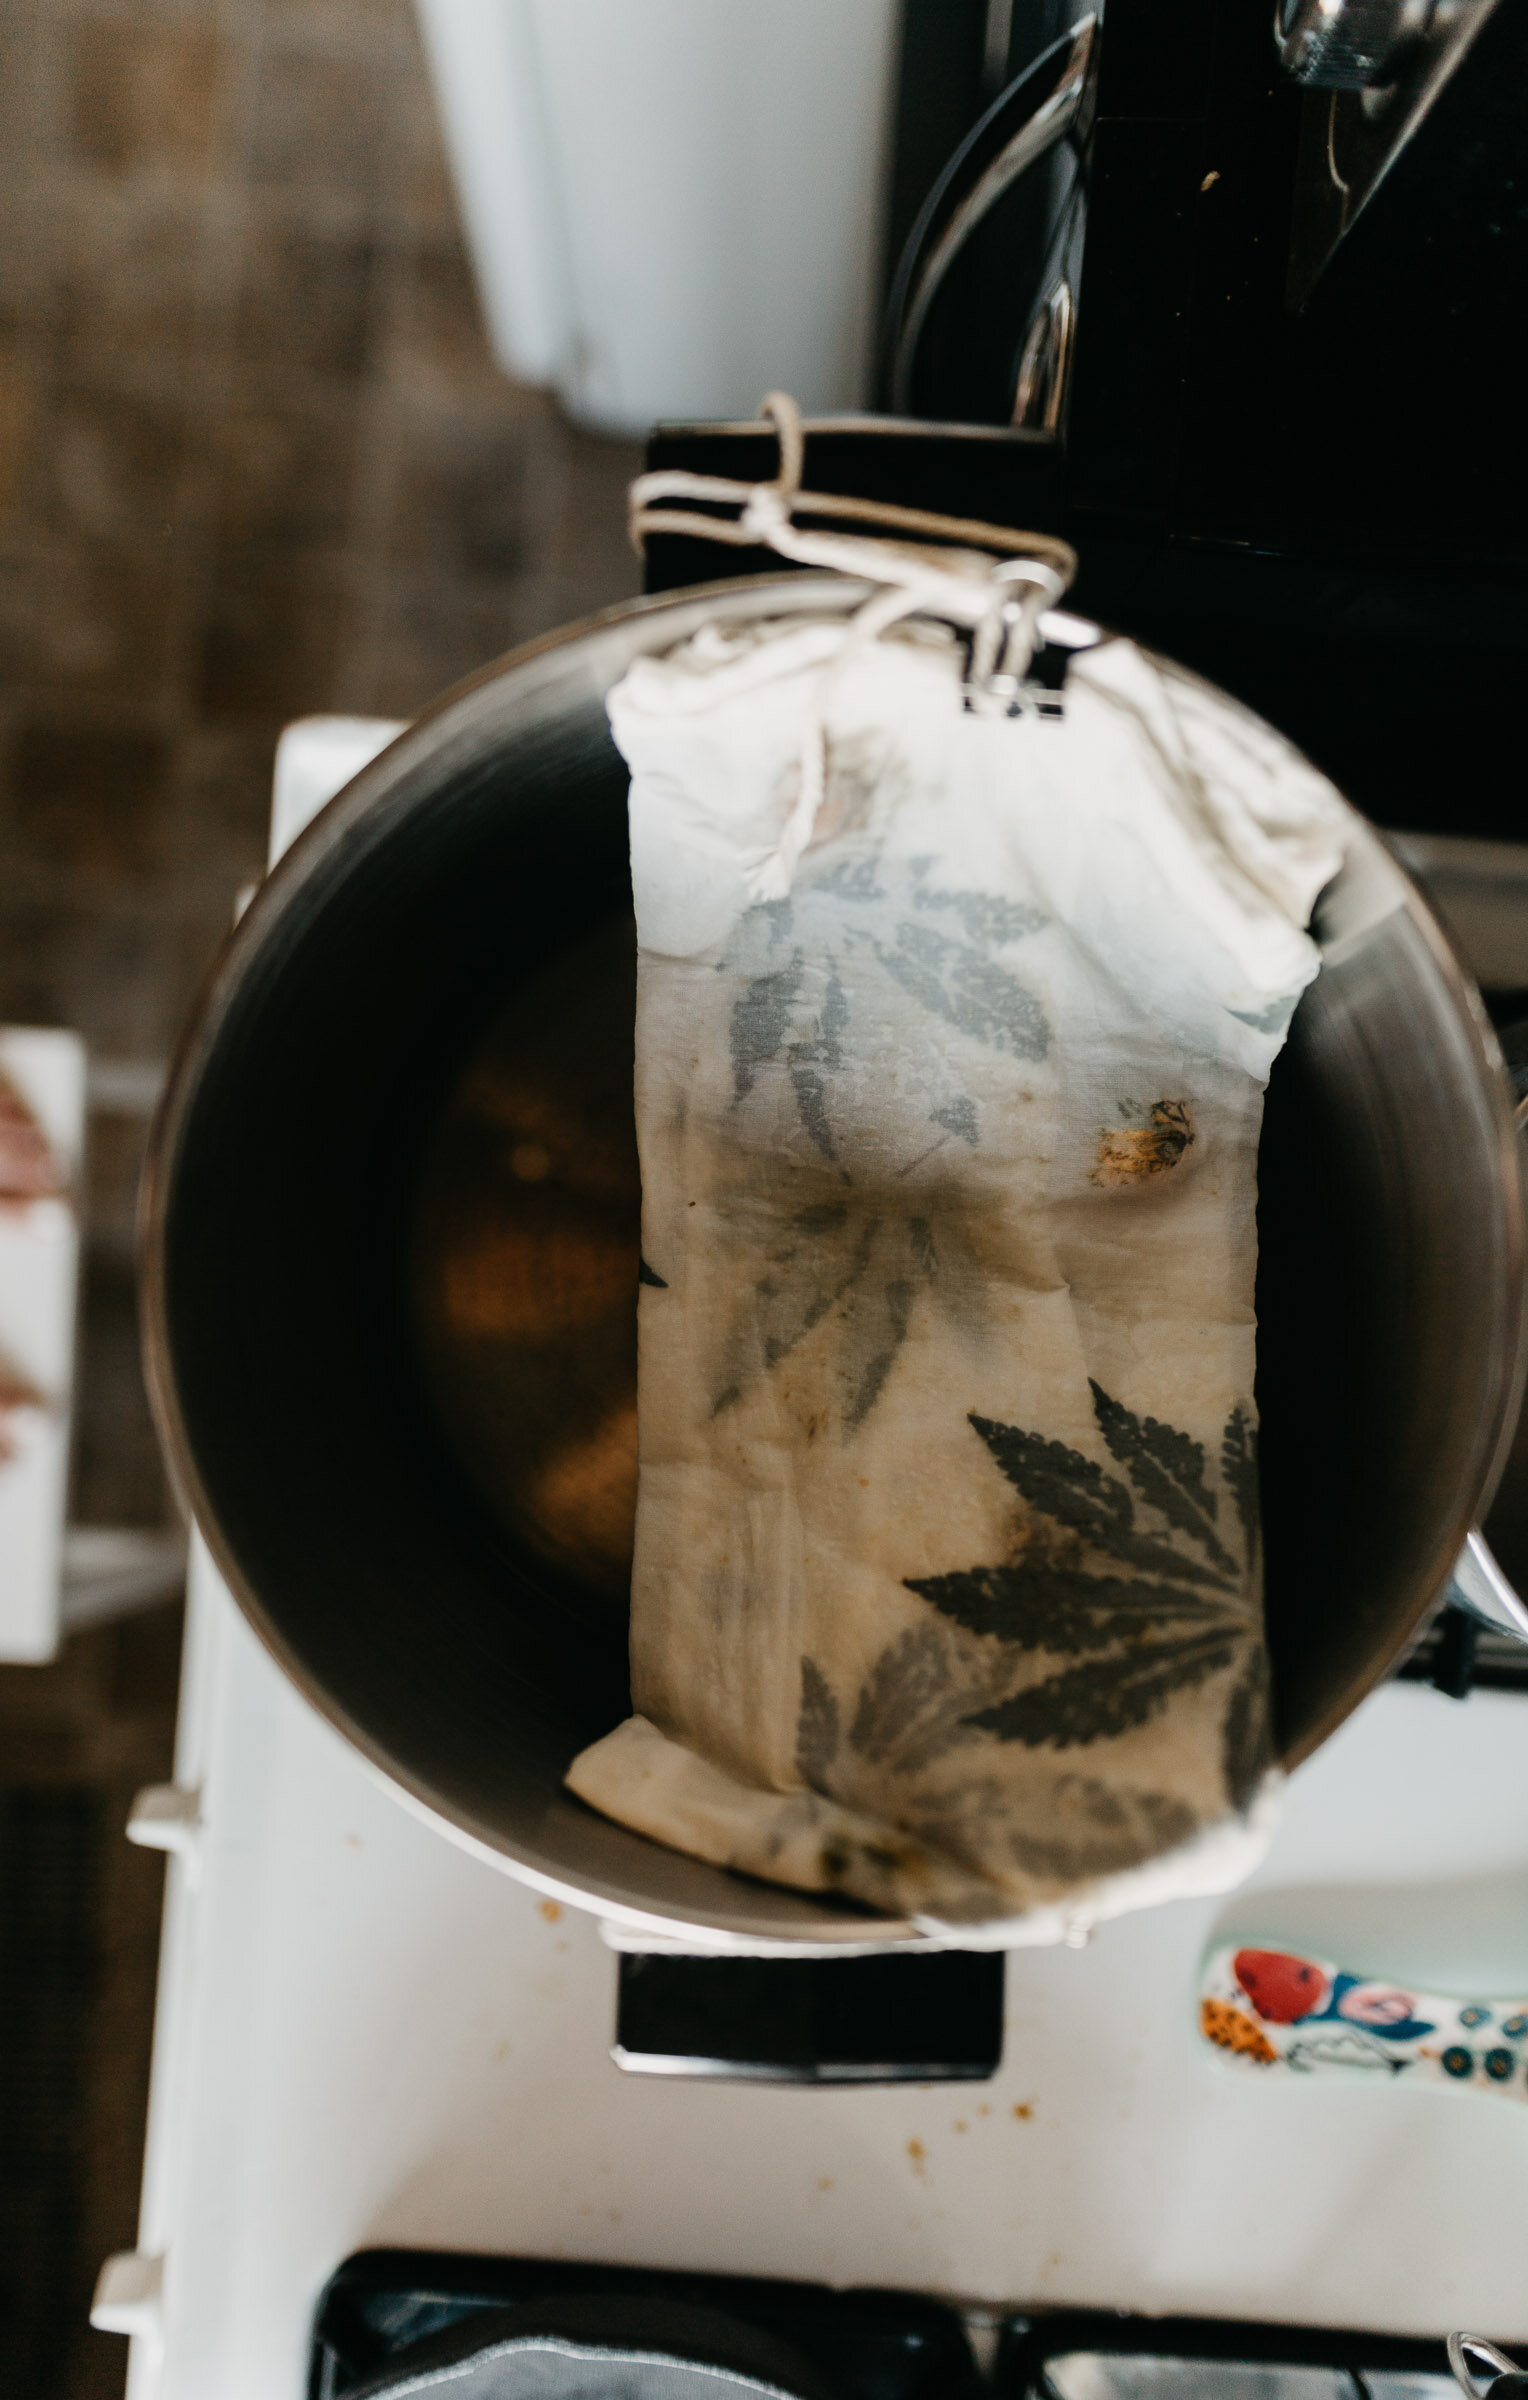
Next, we apply steam. A veggie steamer would be great for this but of course I don’t have one, so I had to rig one up with a regular pot. I filled the bottom of the pot with about 2 inches of water and then pinned a string to either end of my fabric rectangle and attached the opposite ends to the outside of the pot, so that inside, my fabric hovers above the water in the pot. Put the lid on and let it get steamy! I steamed it for about 25 minutes — not too long because I didn’t want the shapes to bleed.
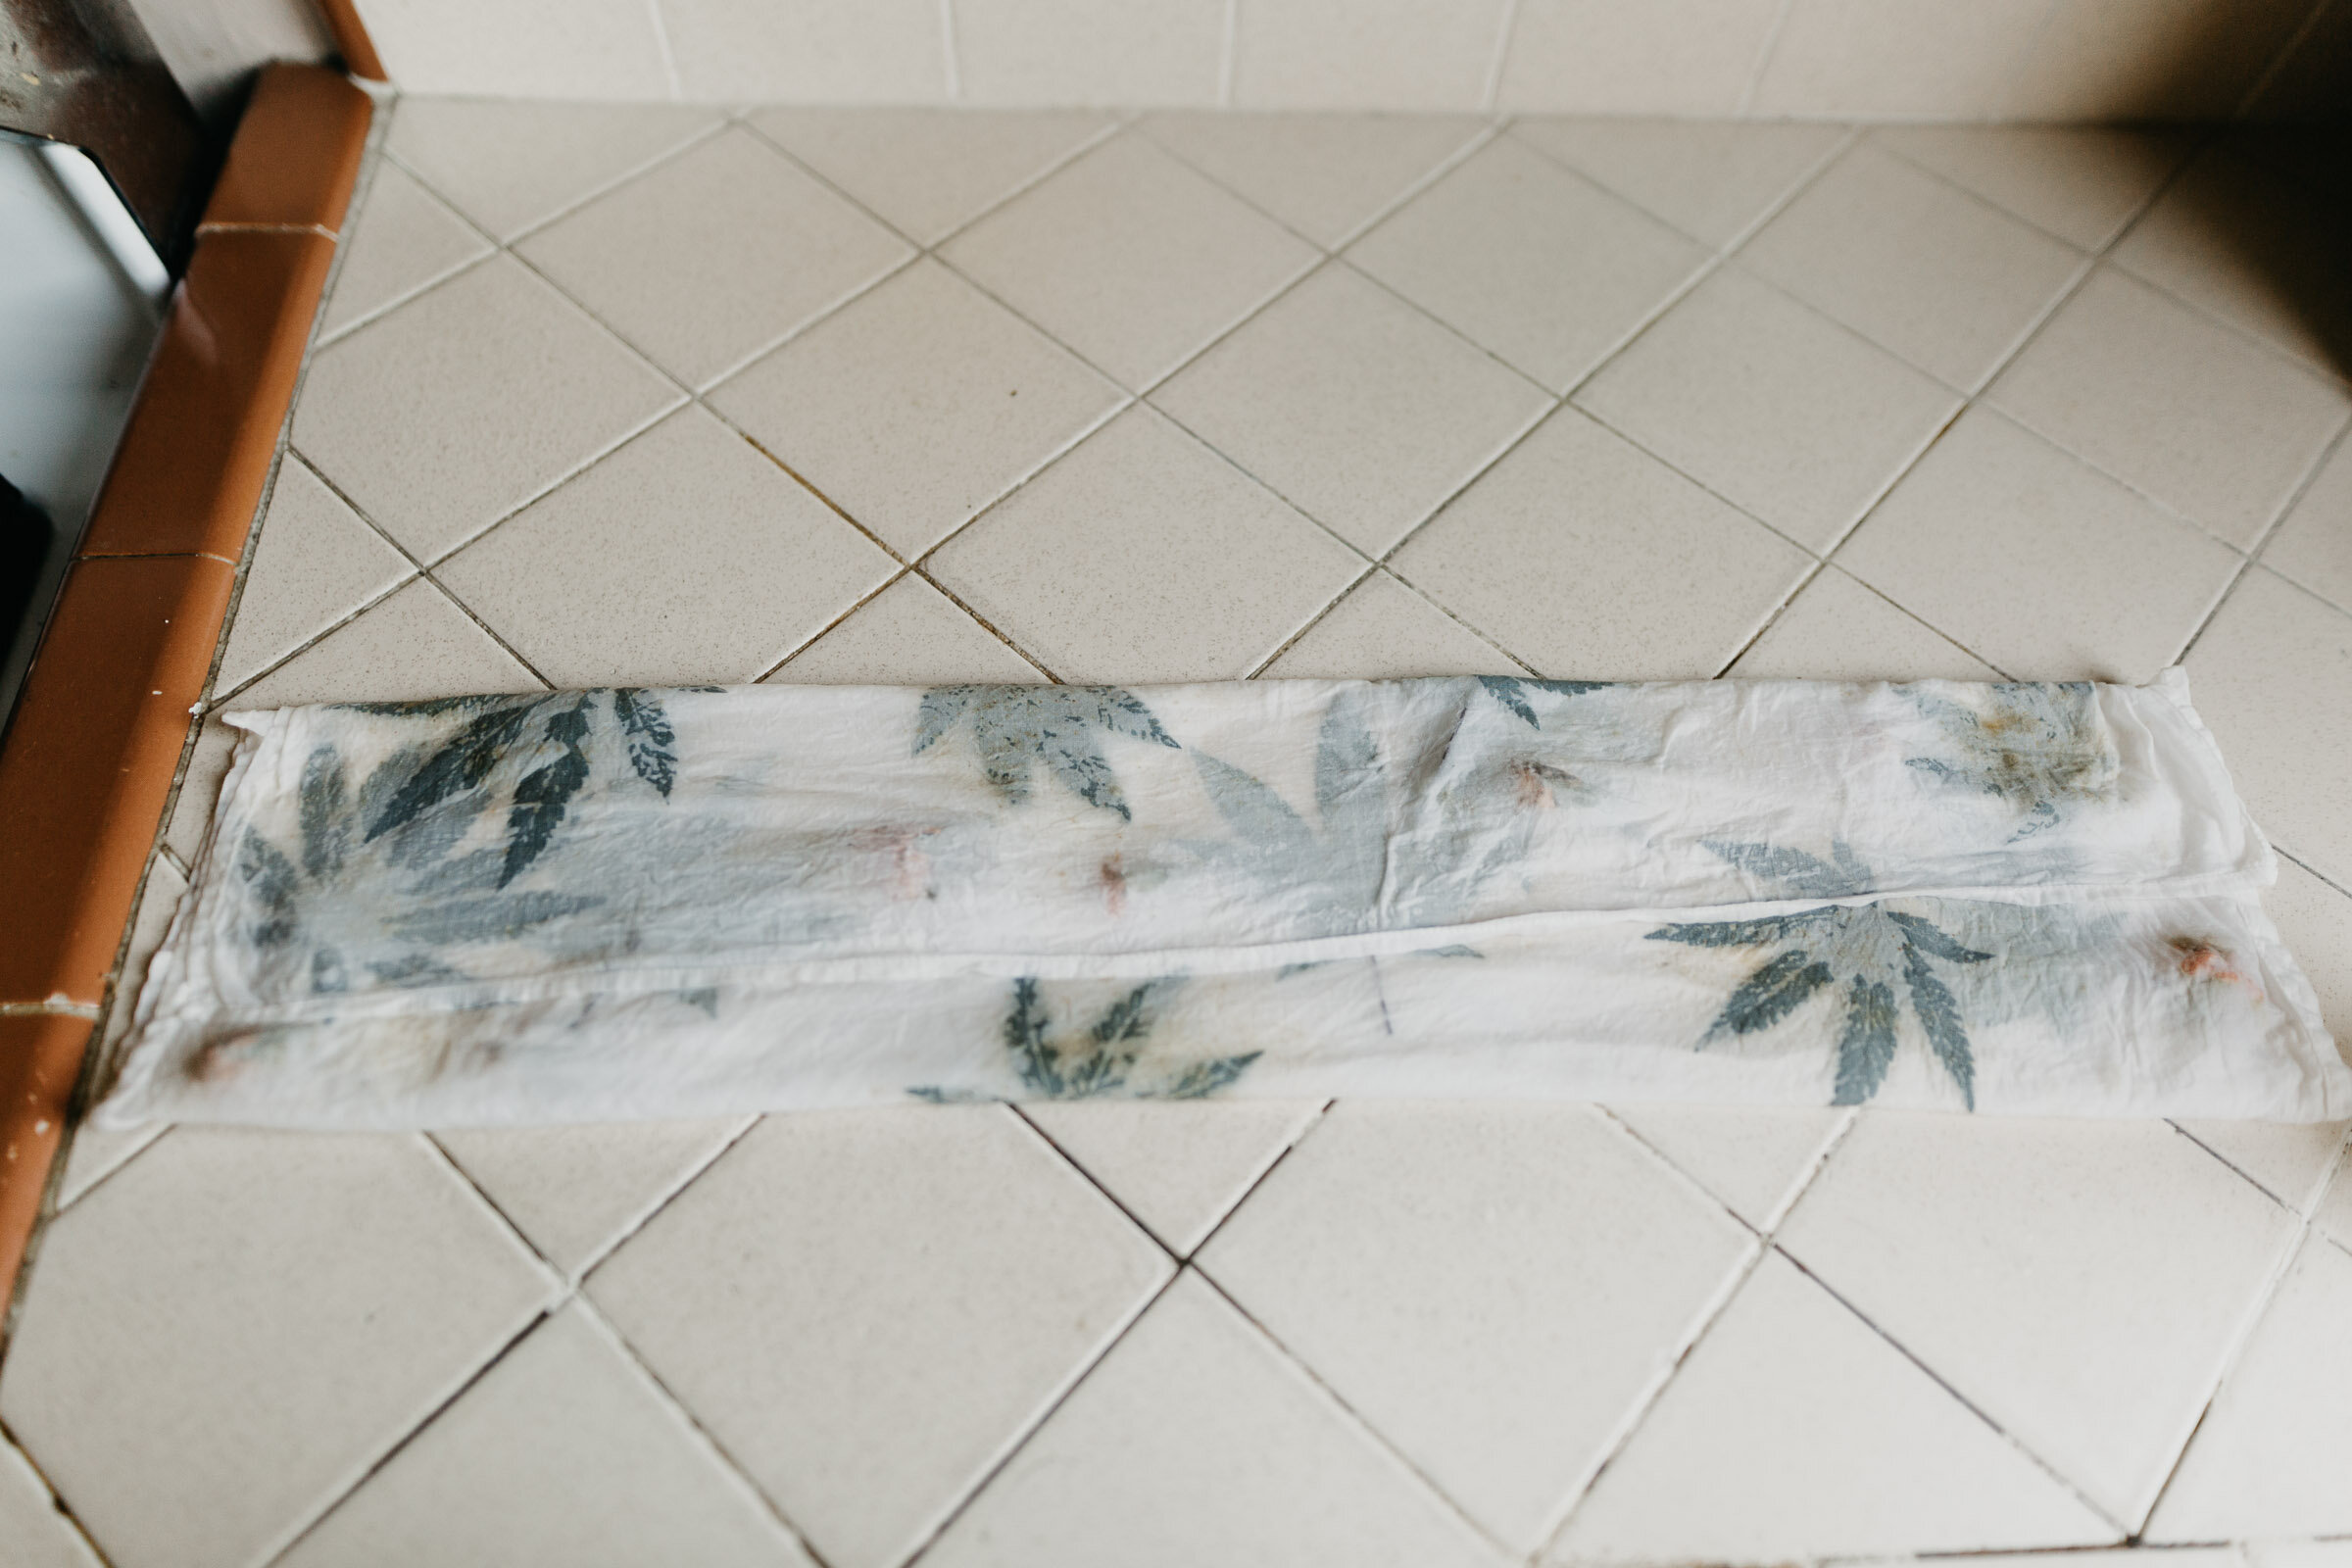
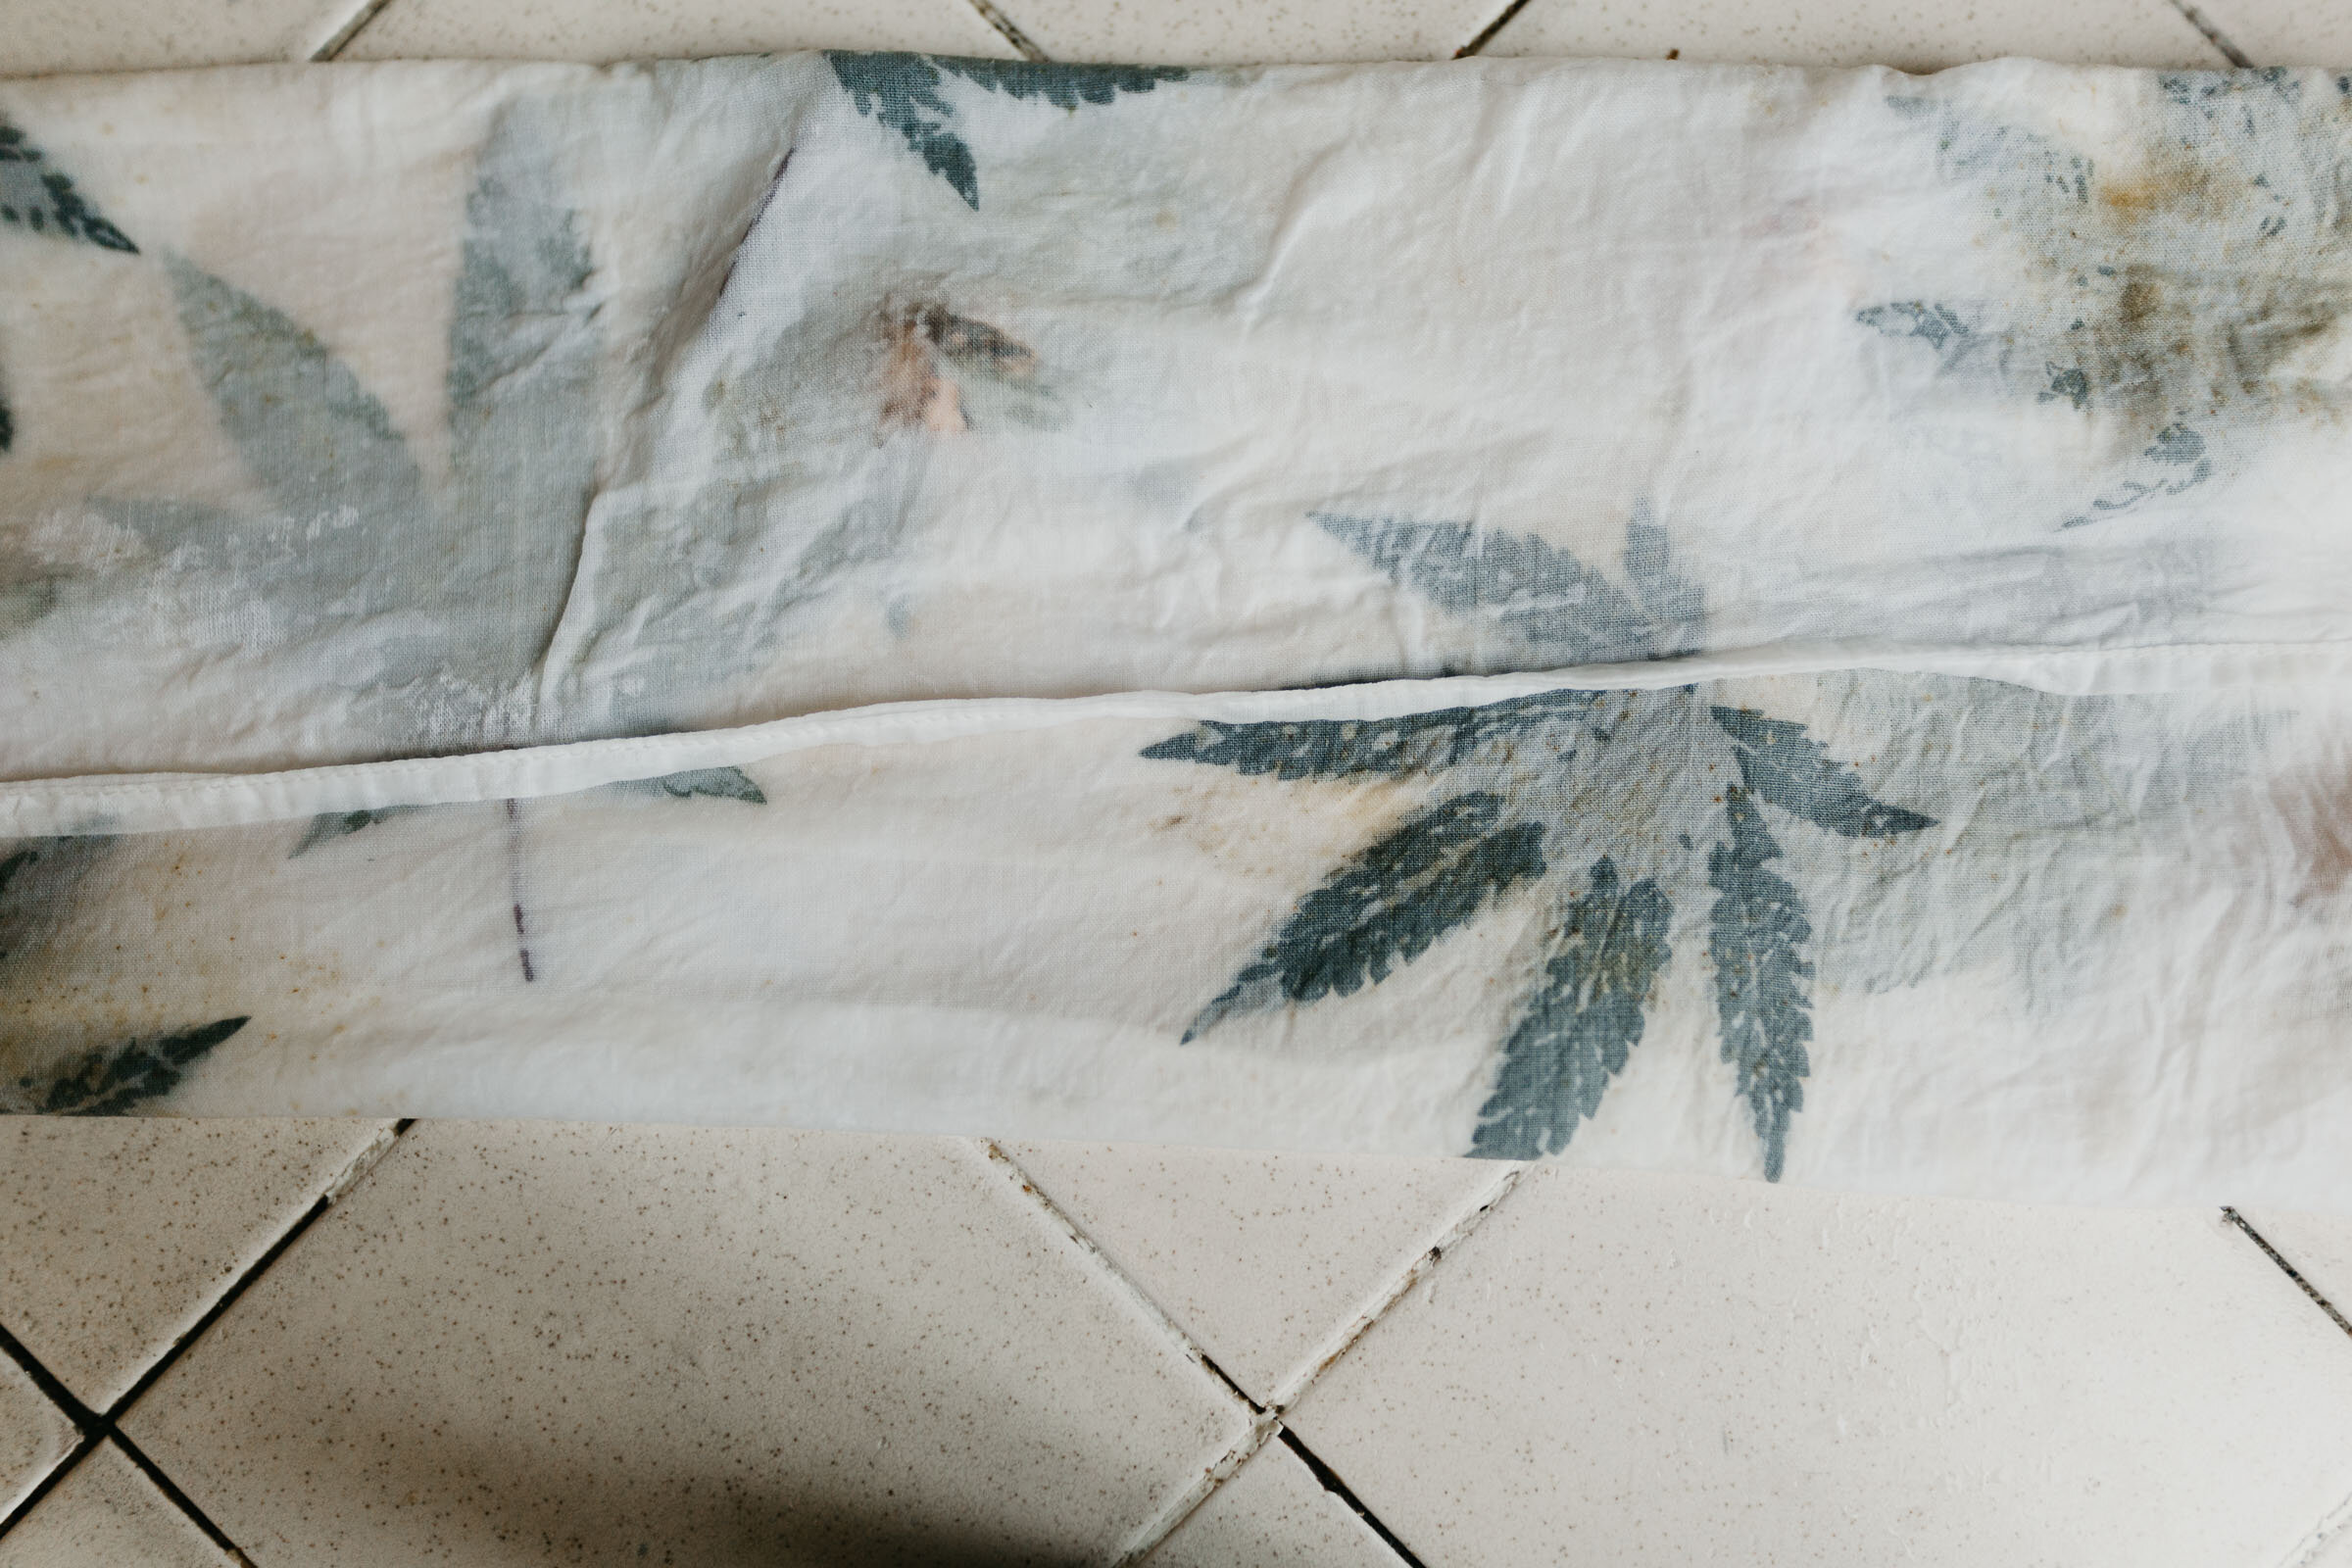
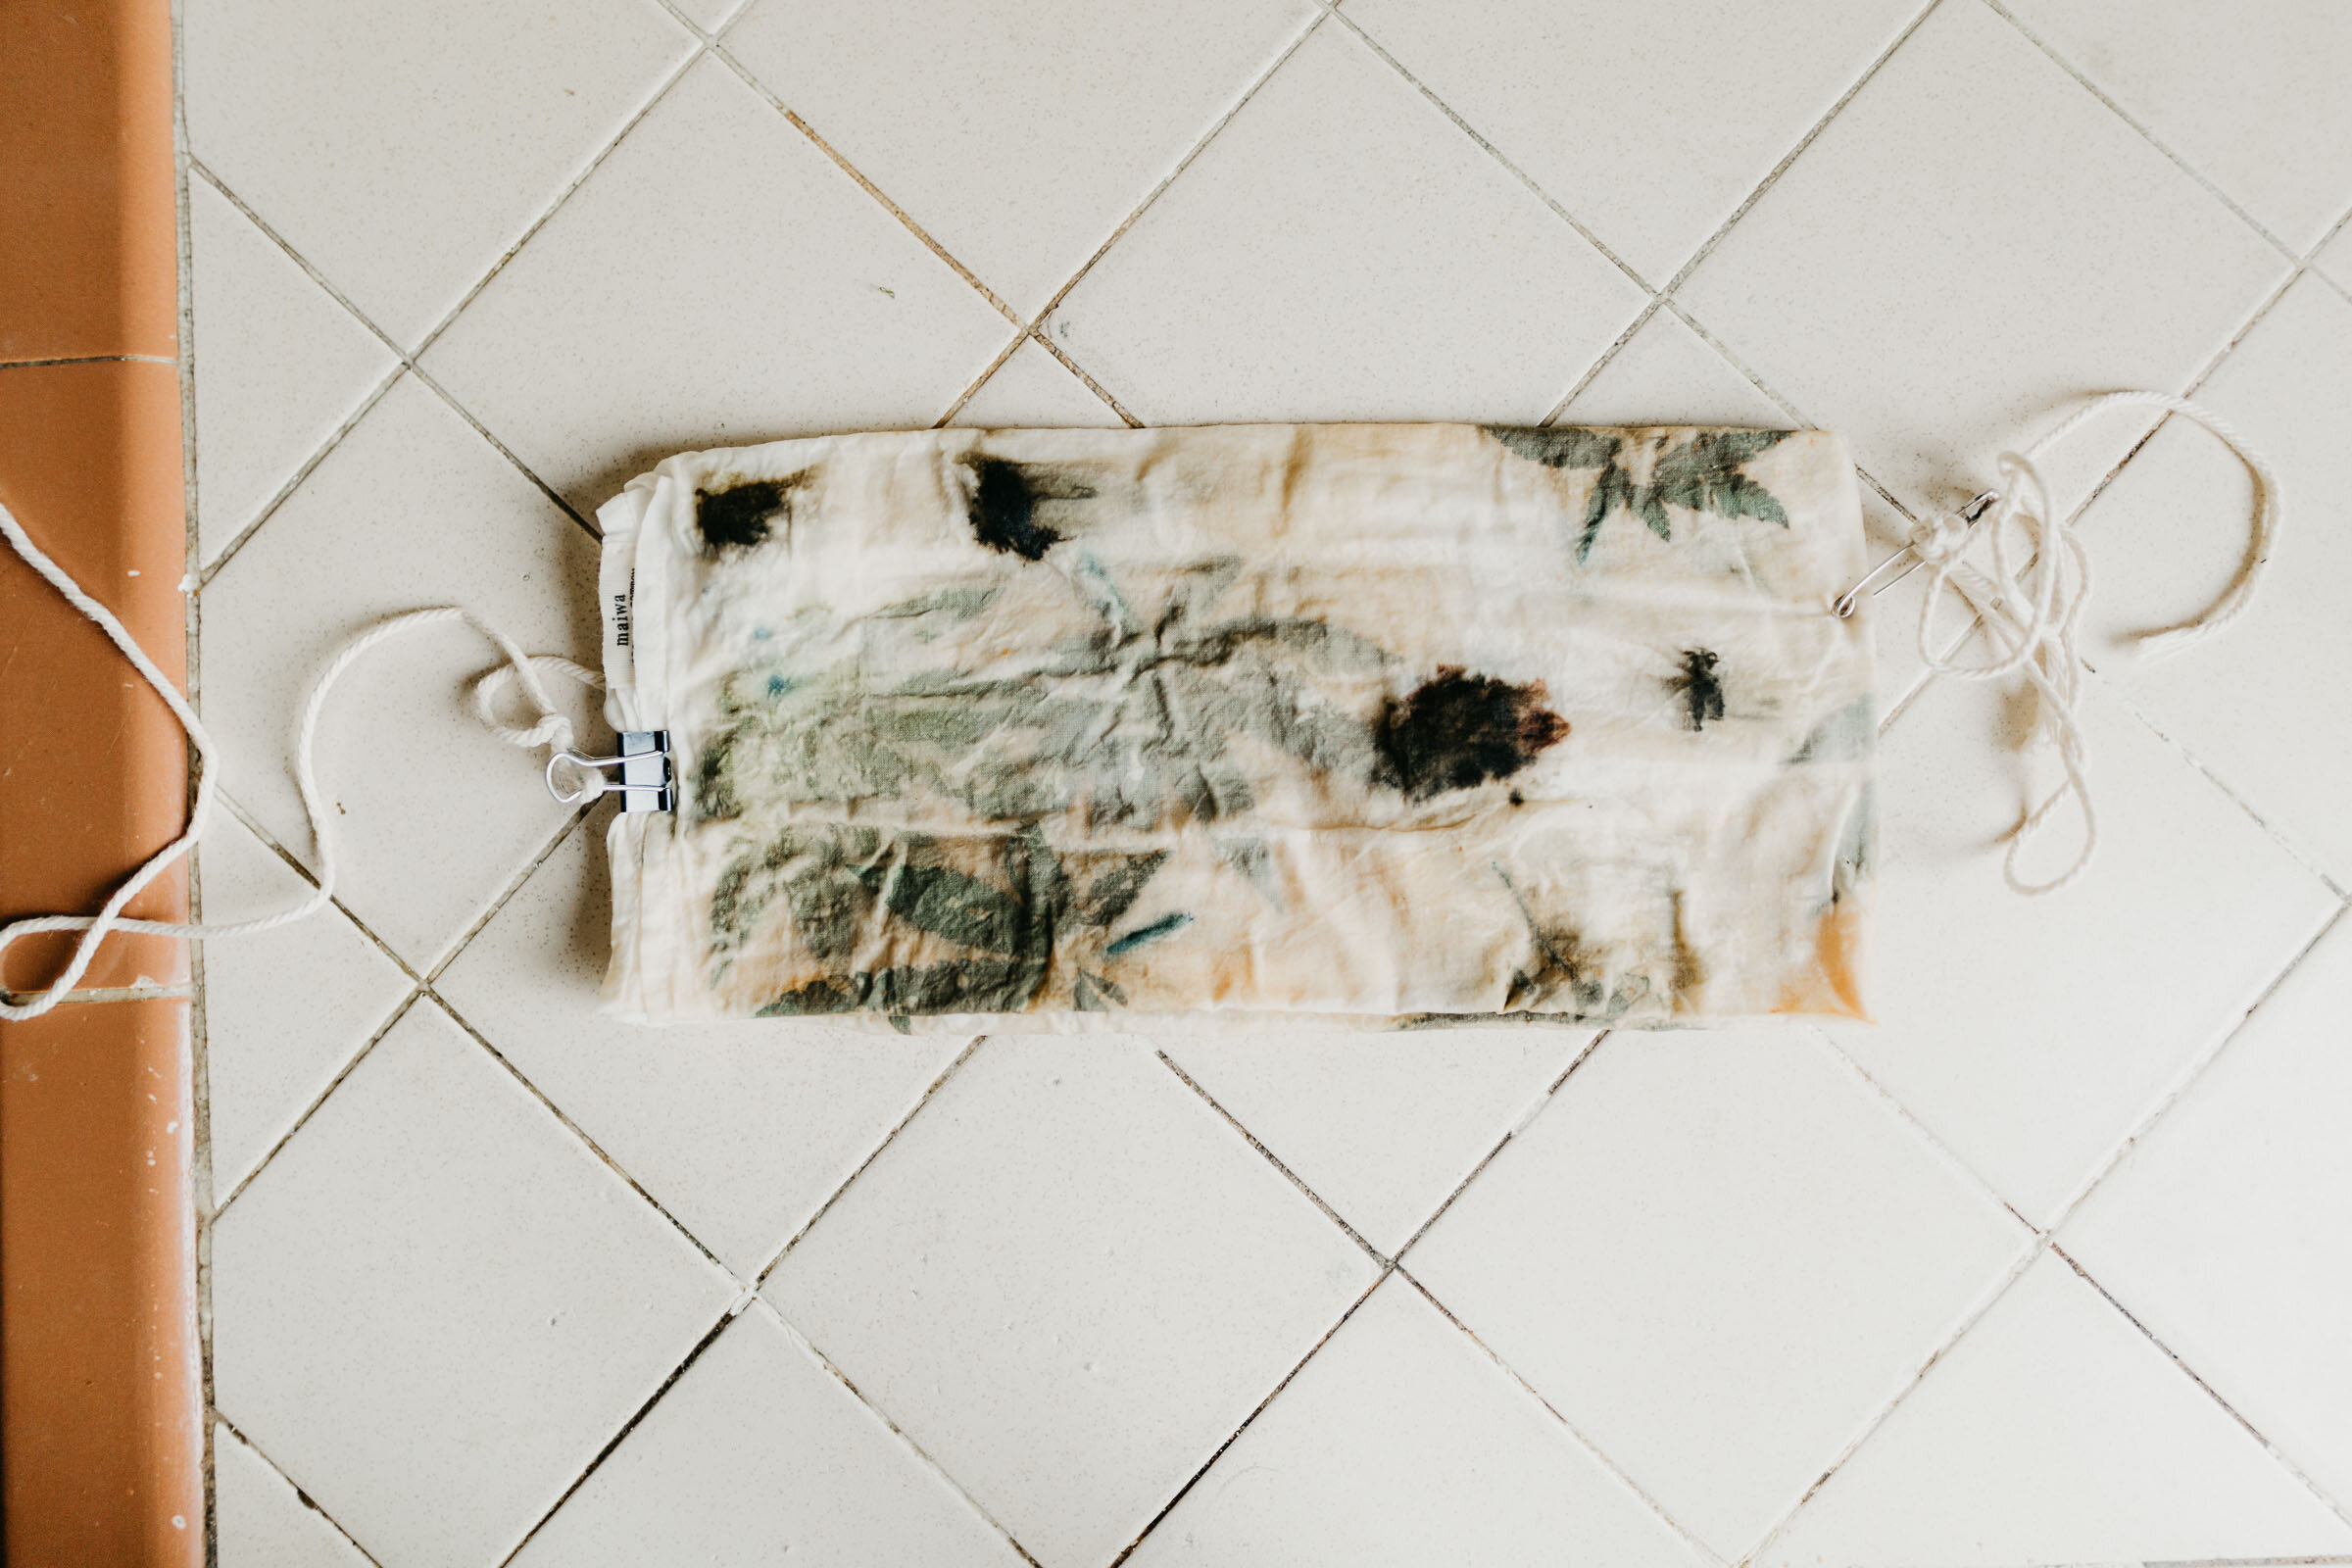
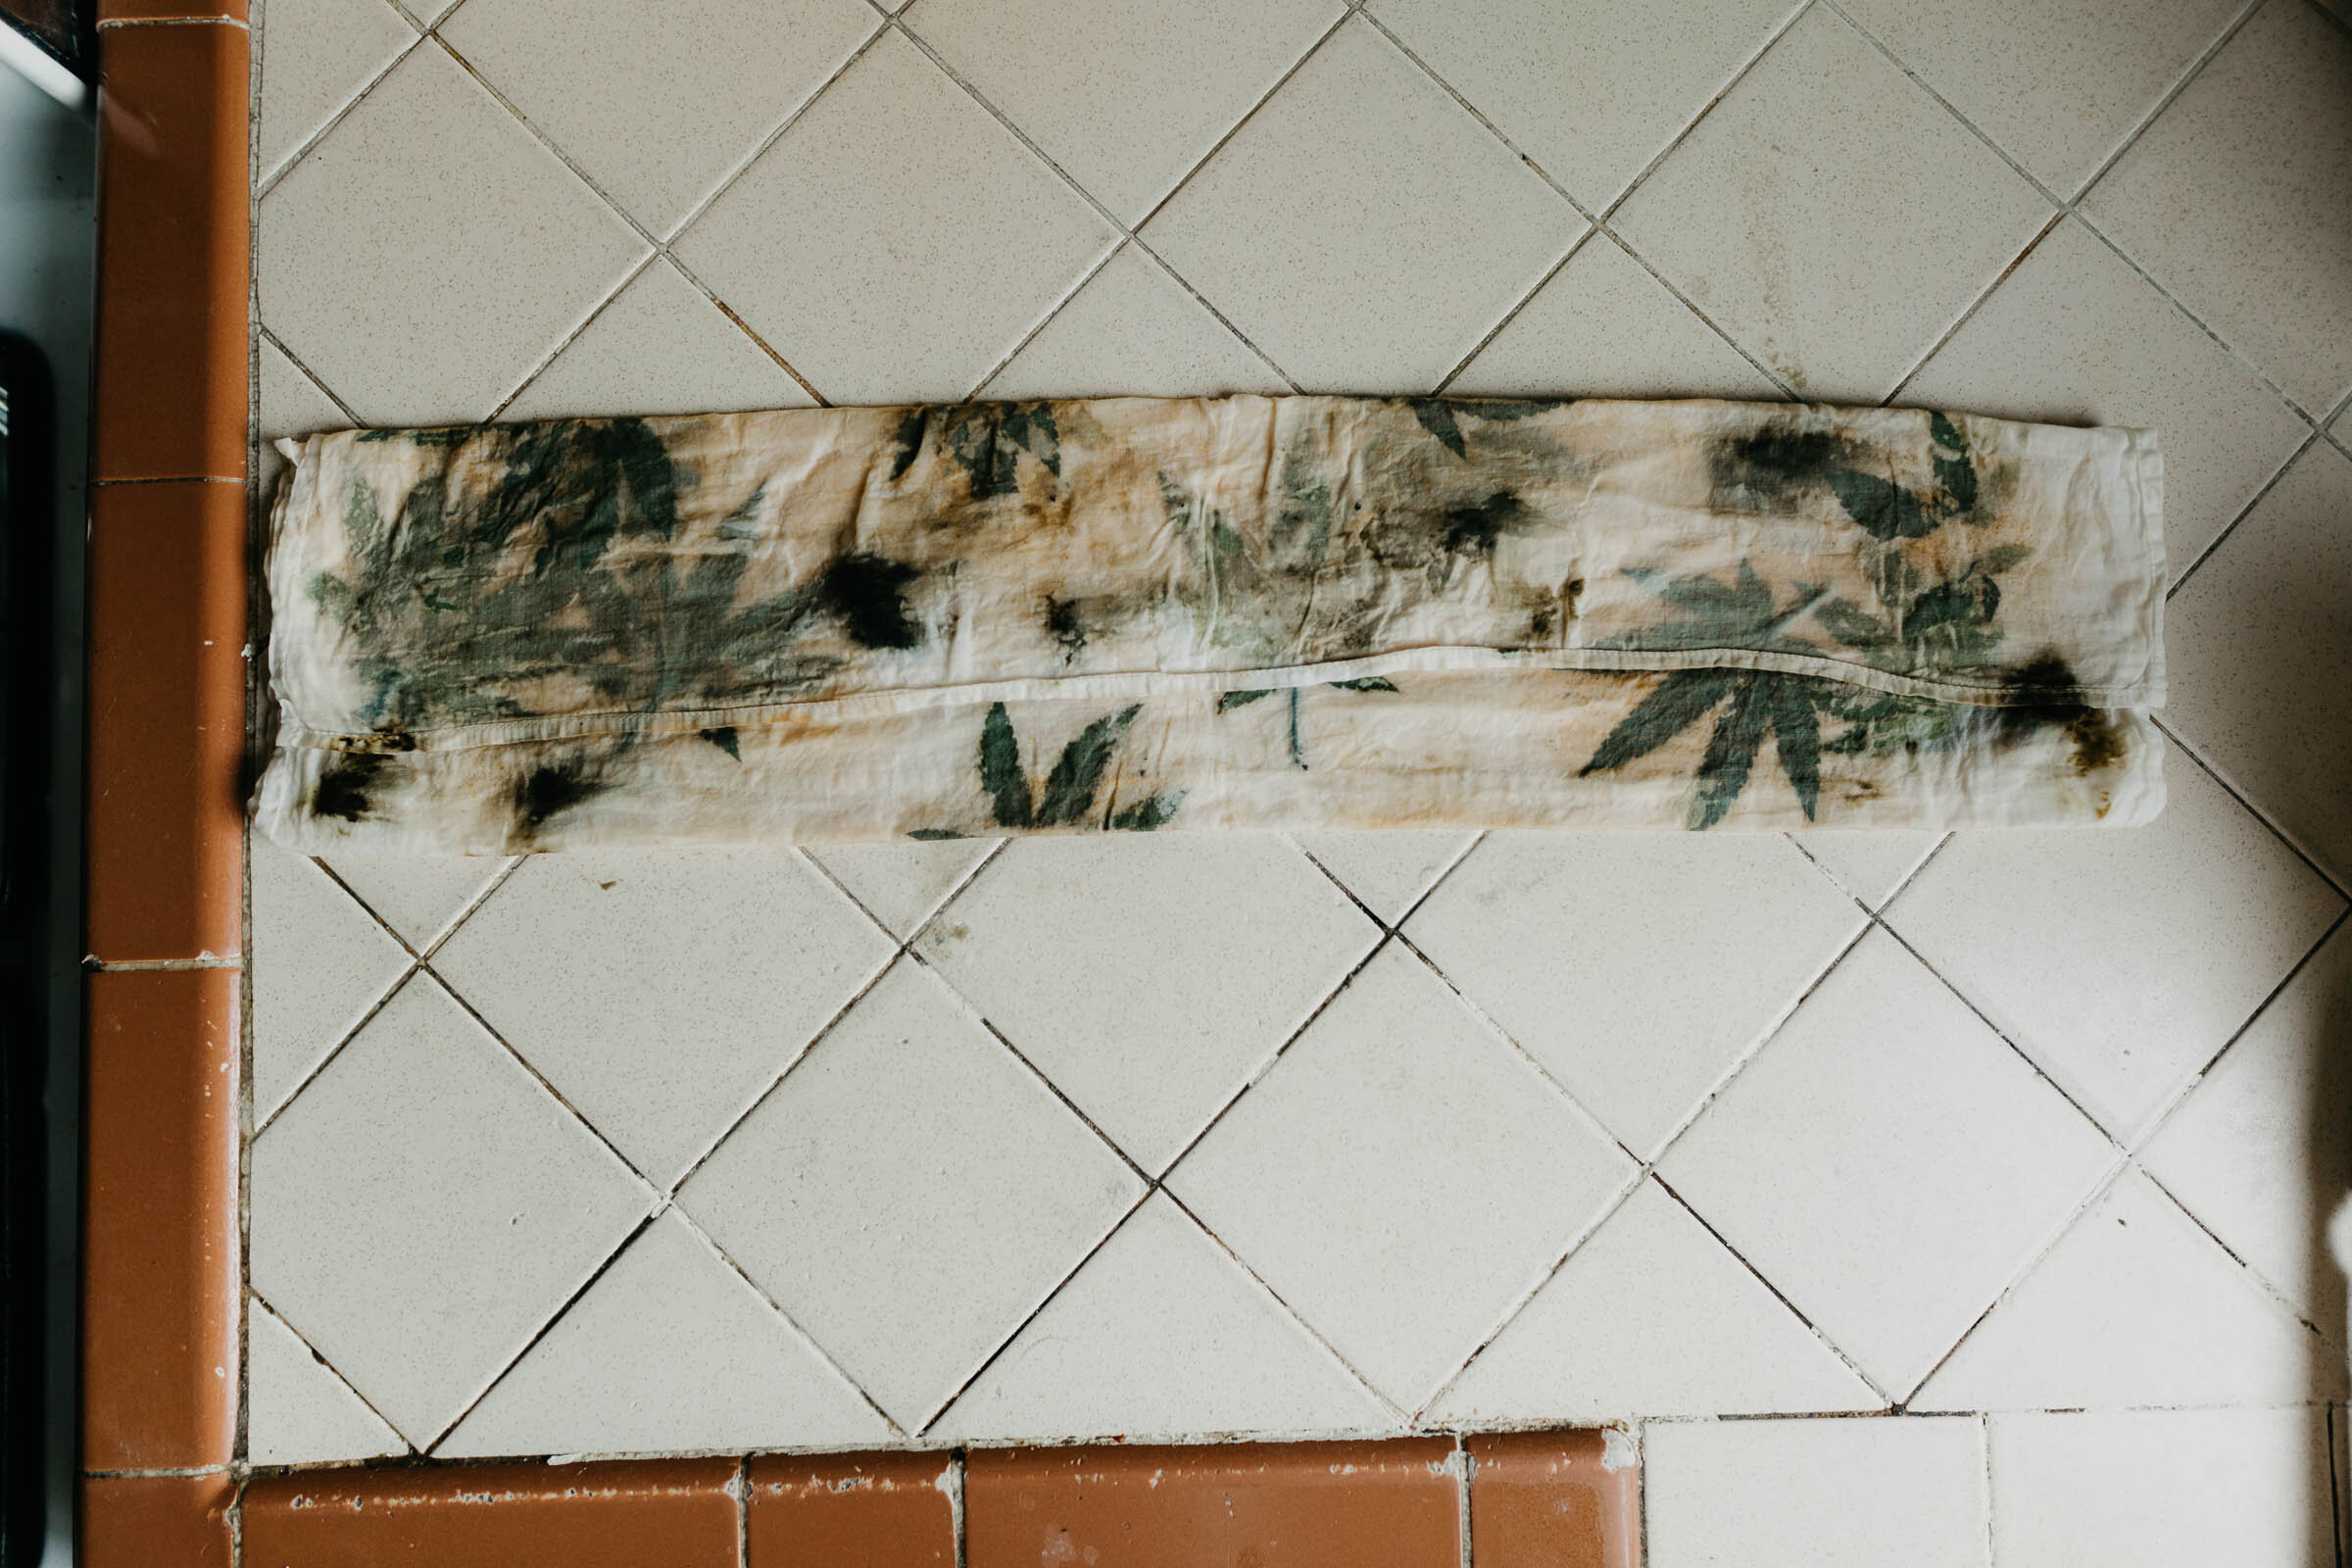
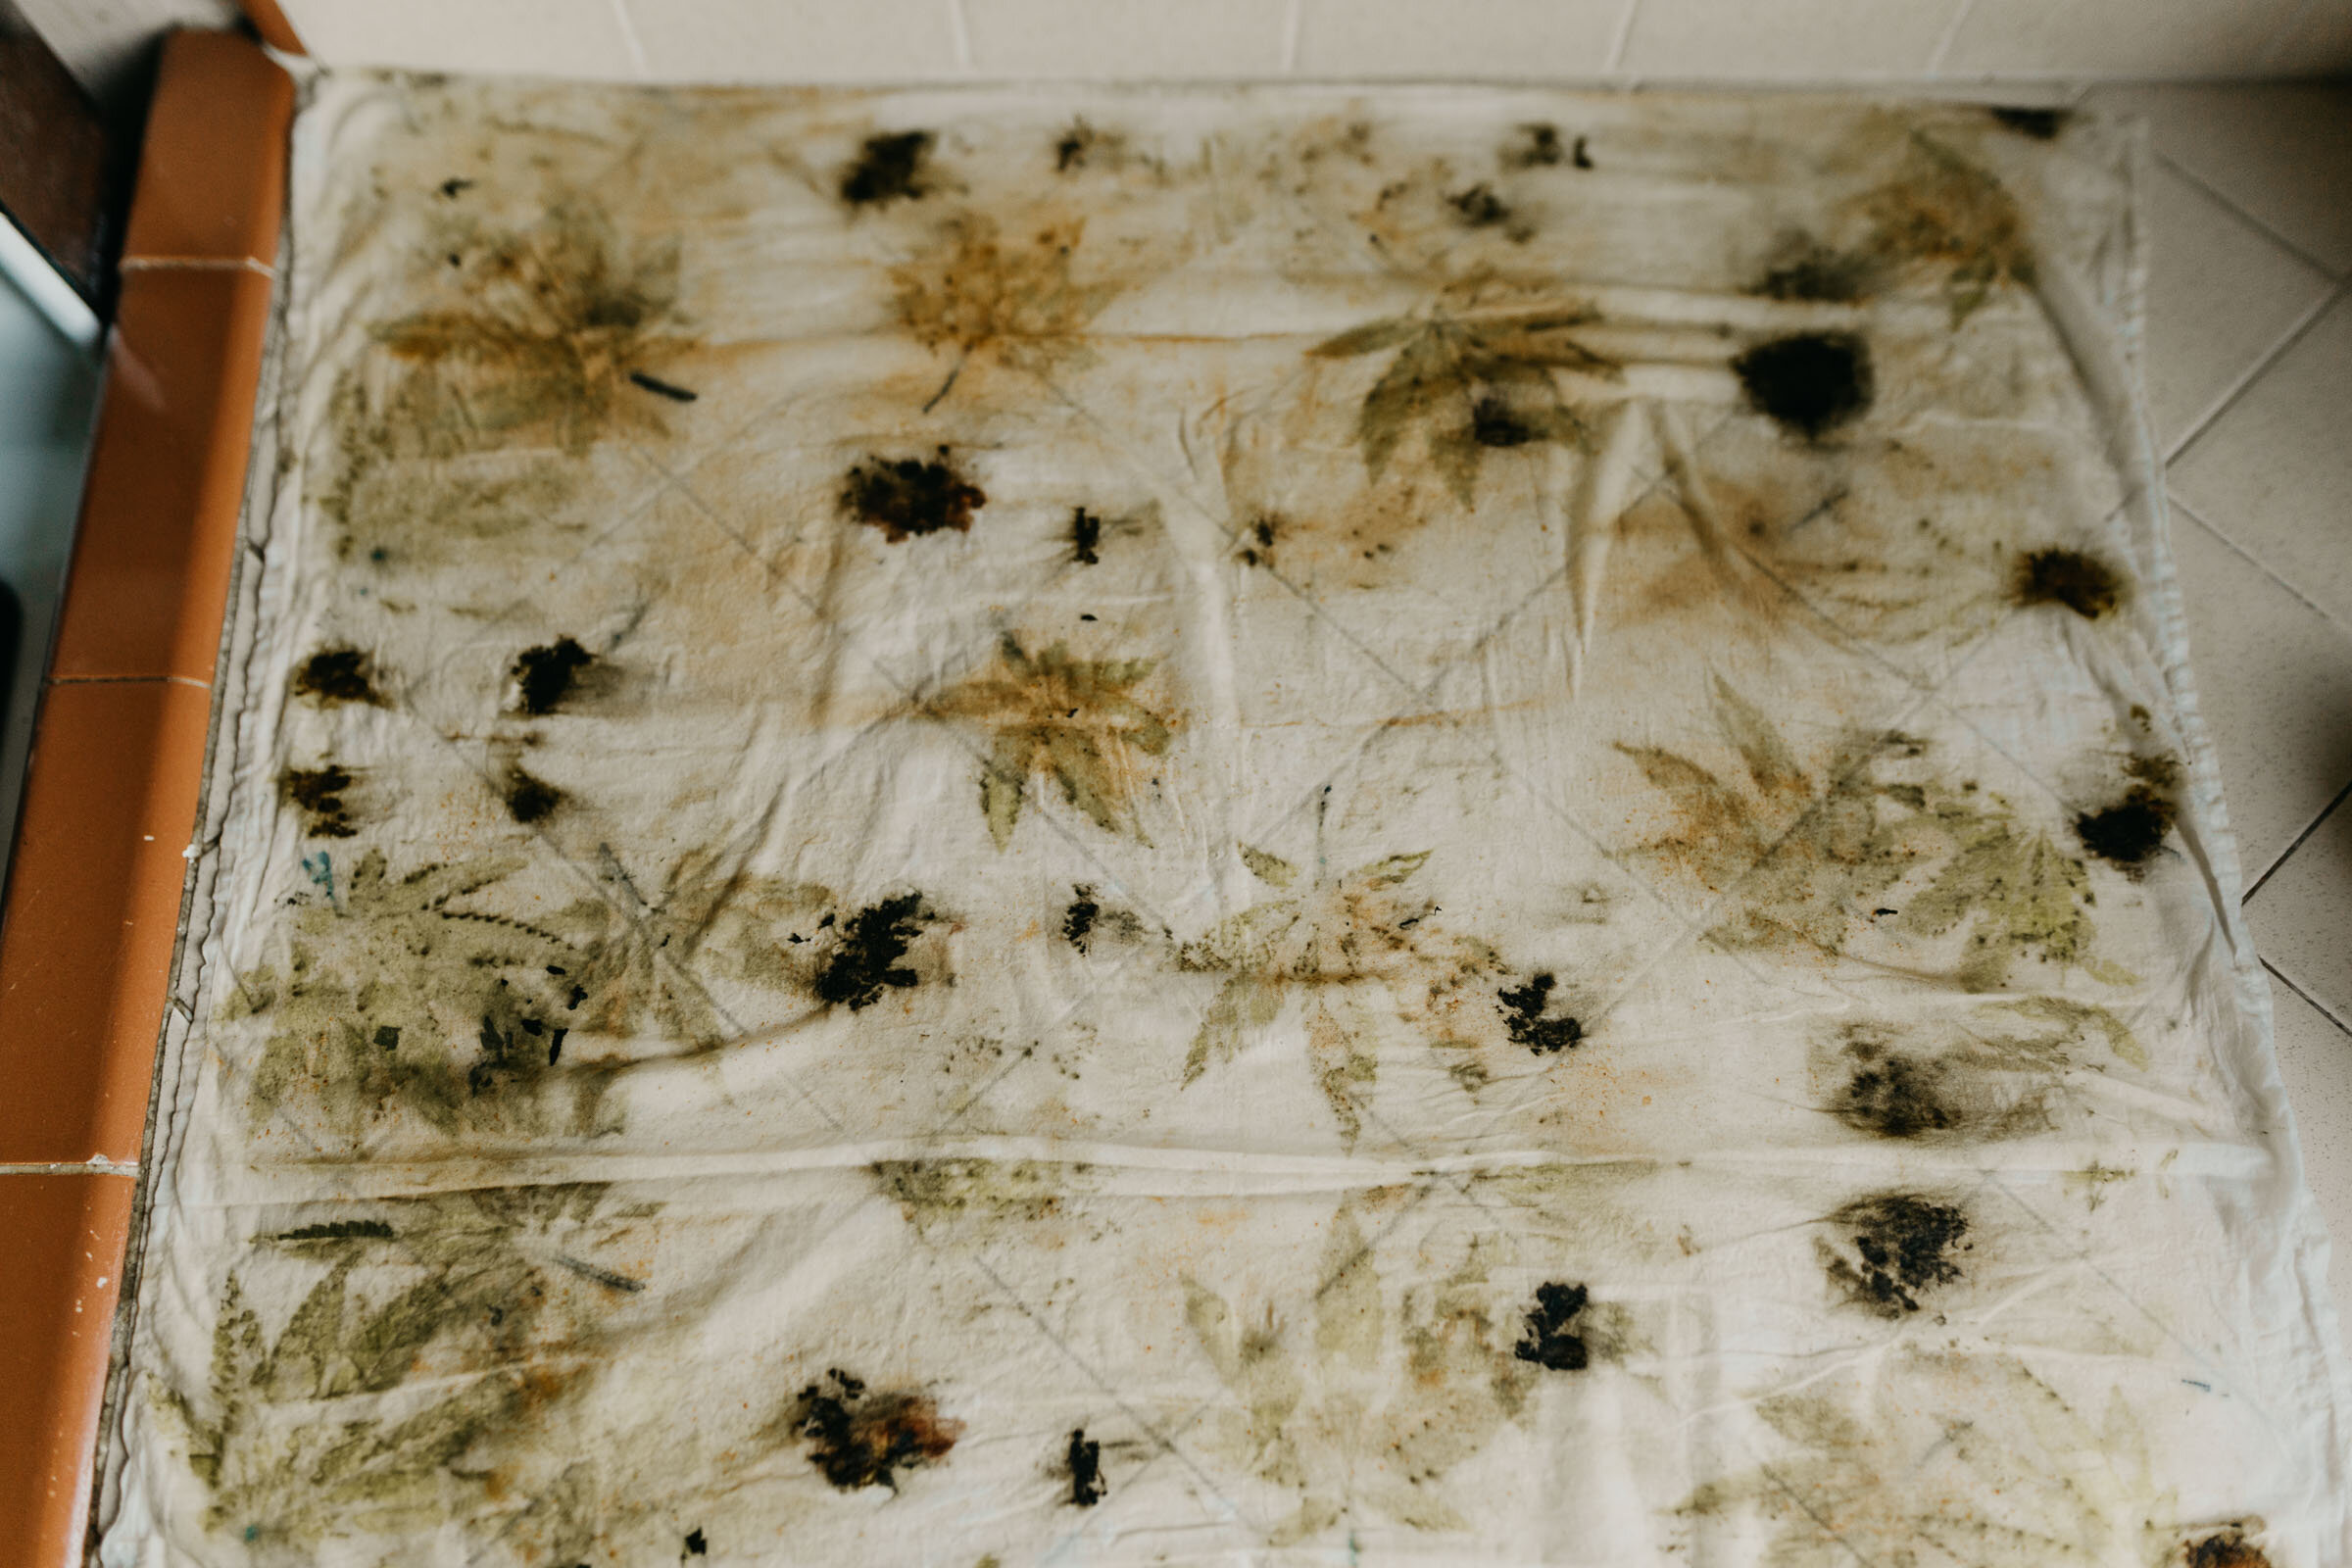
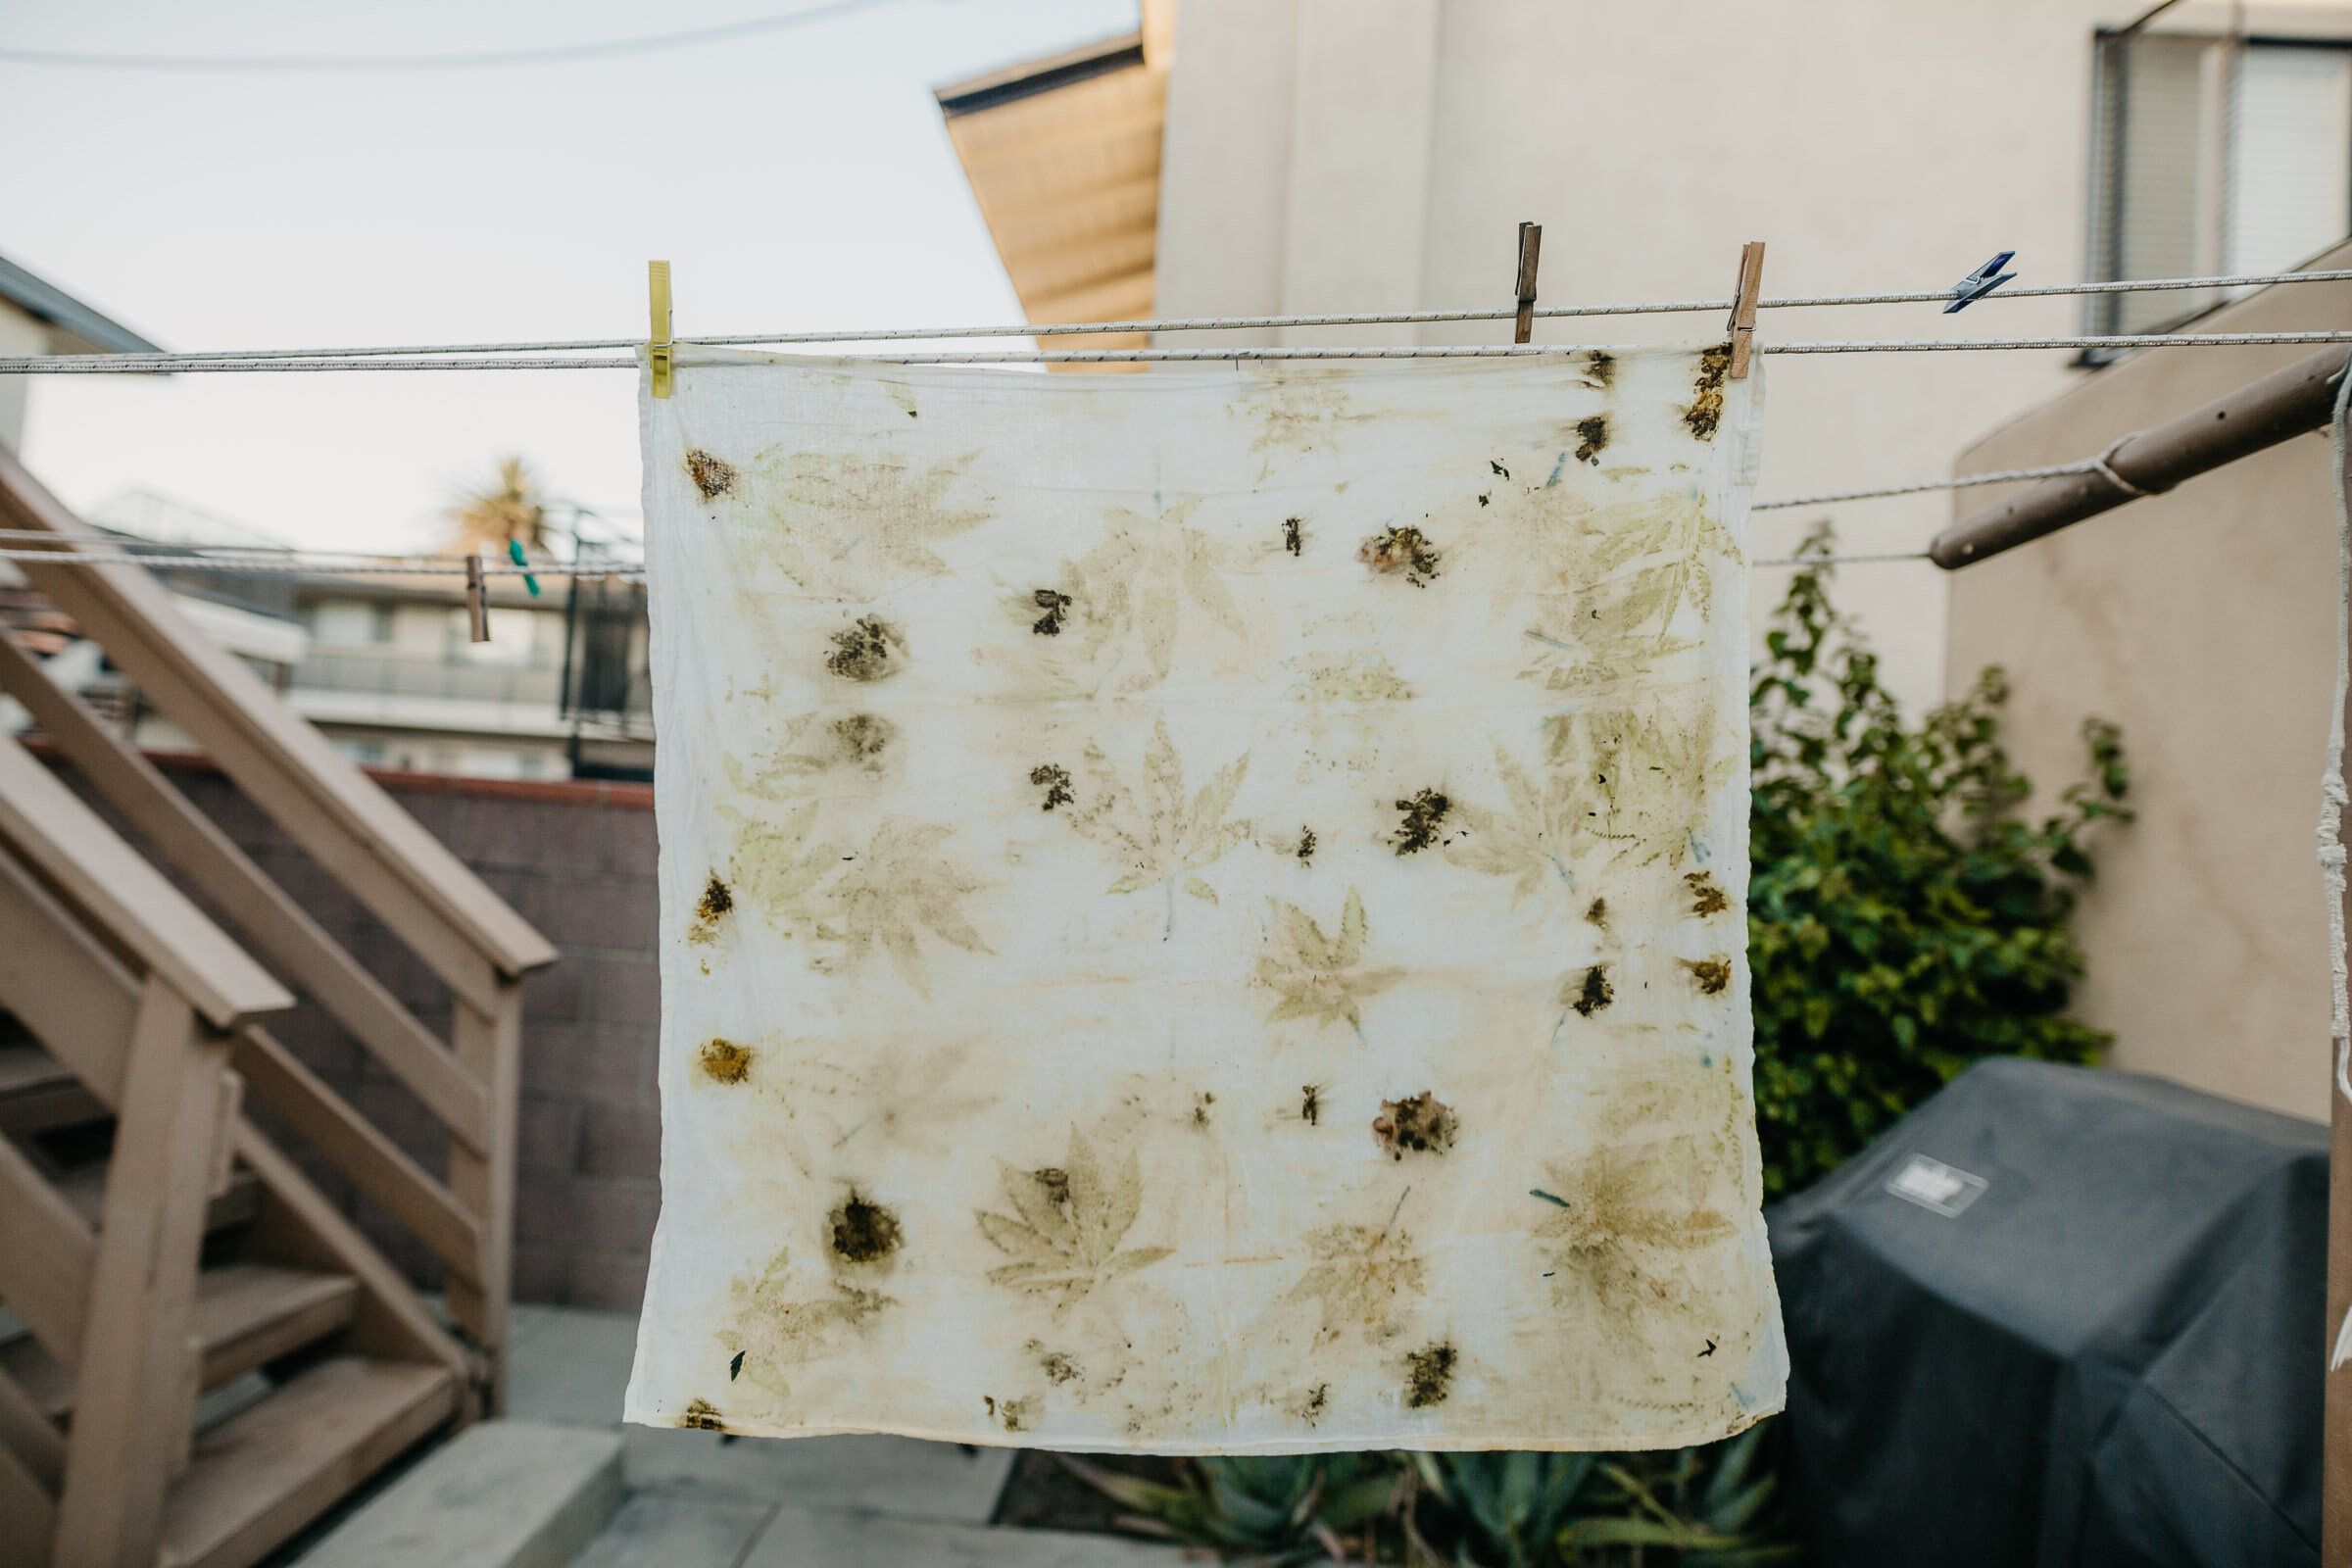
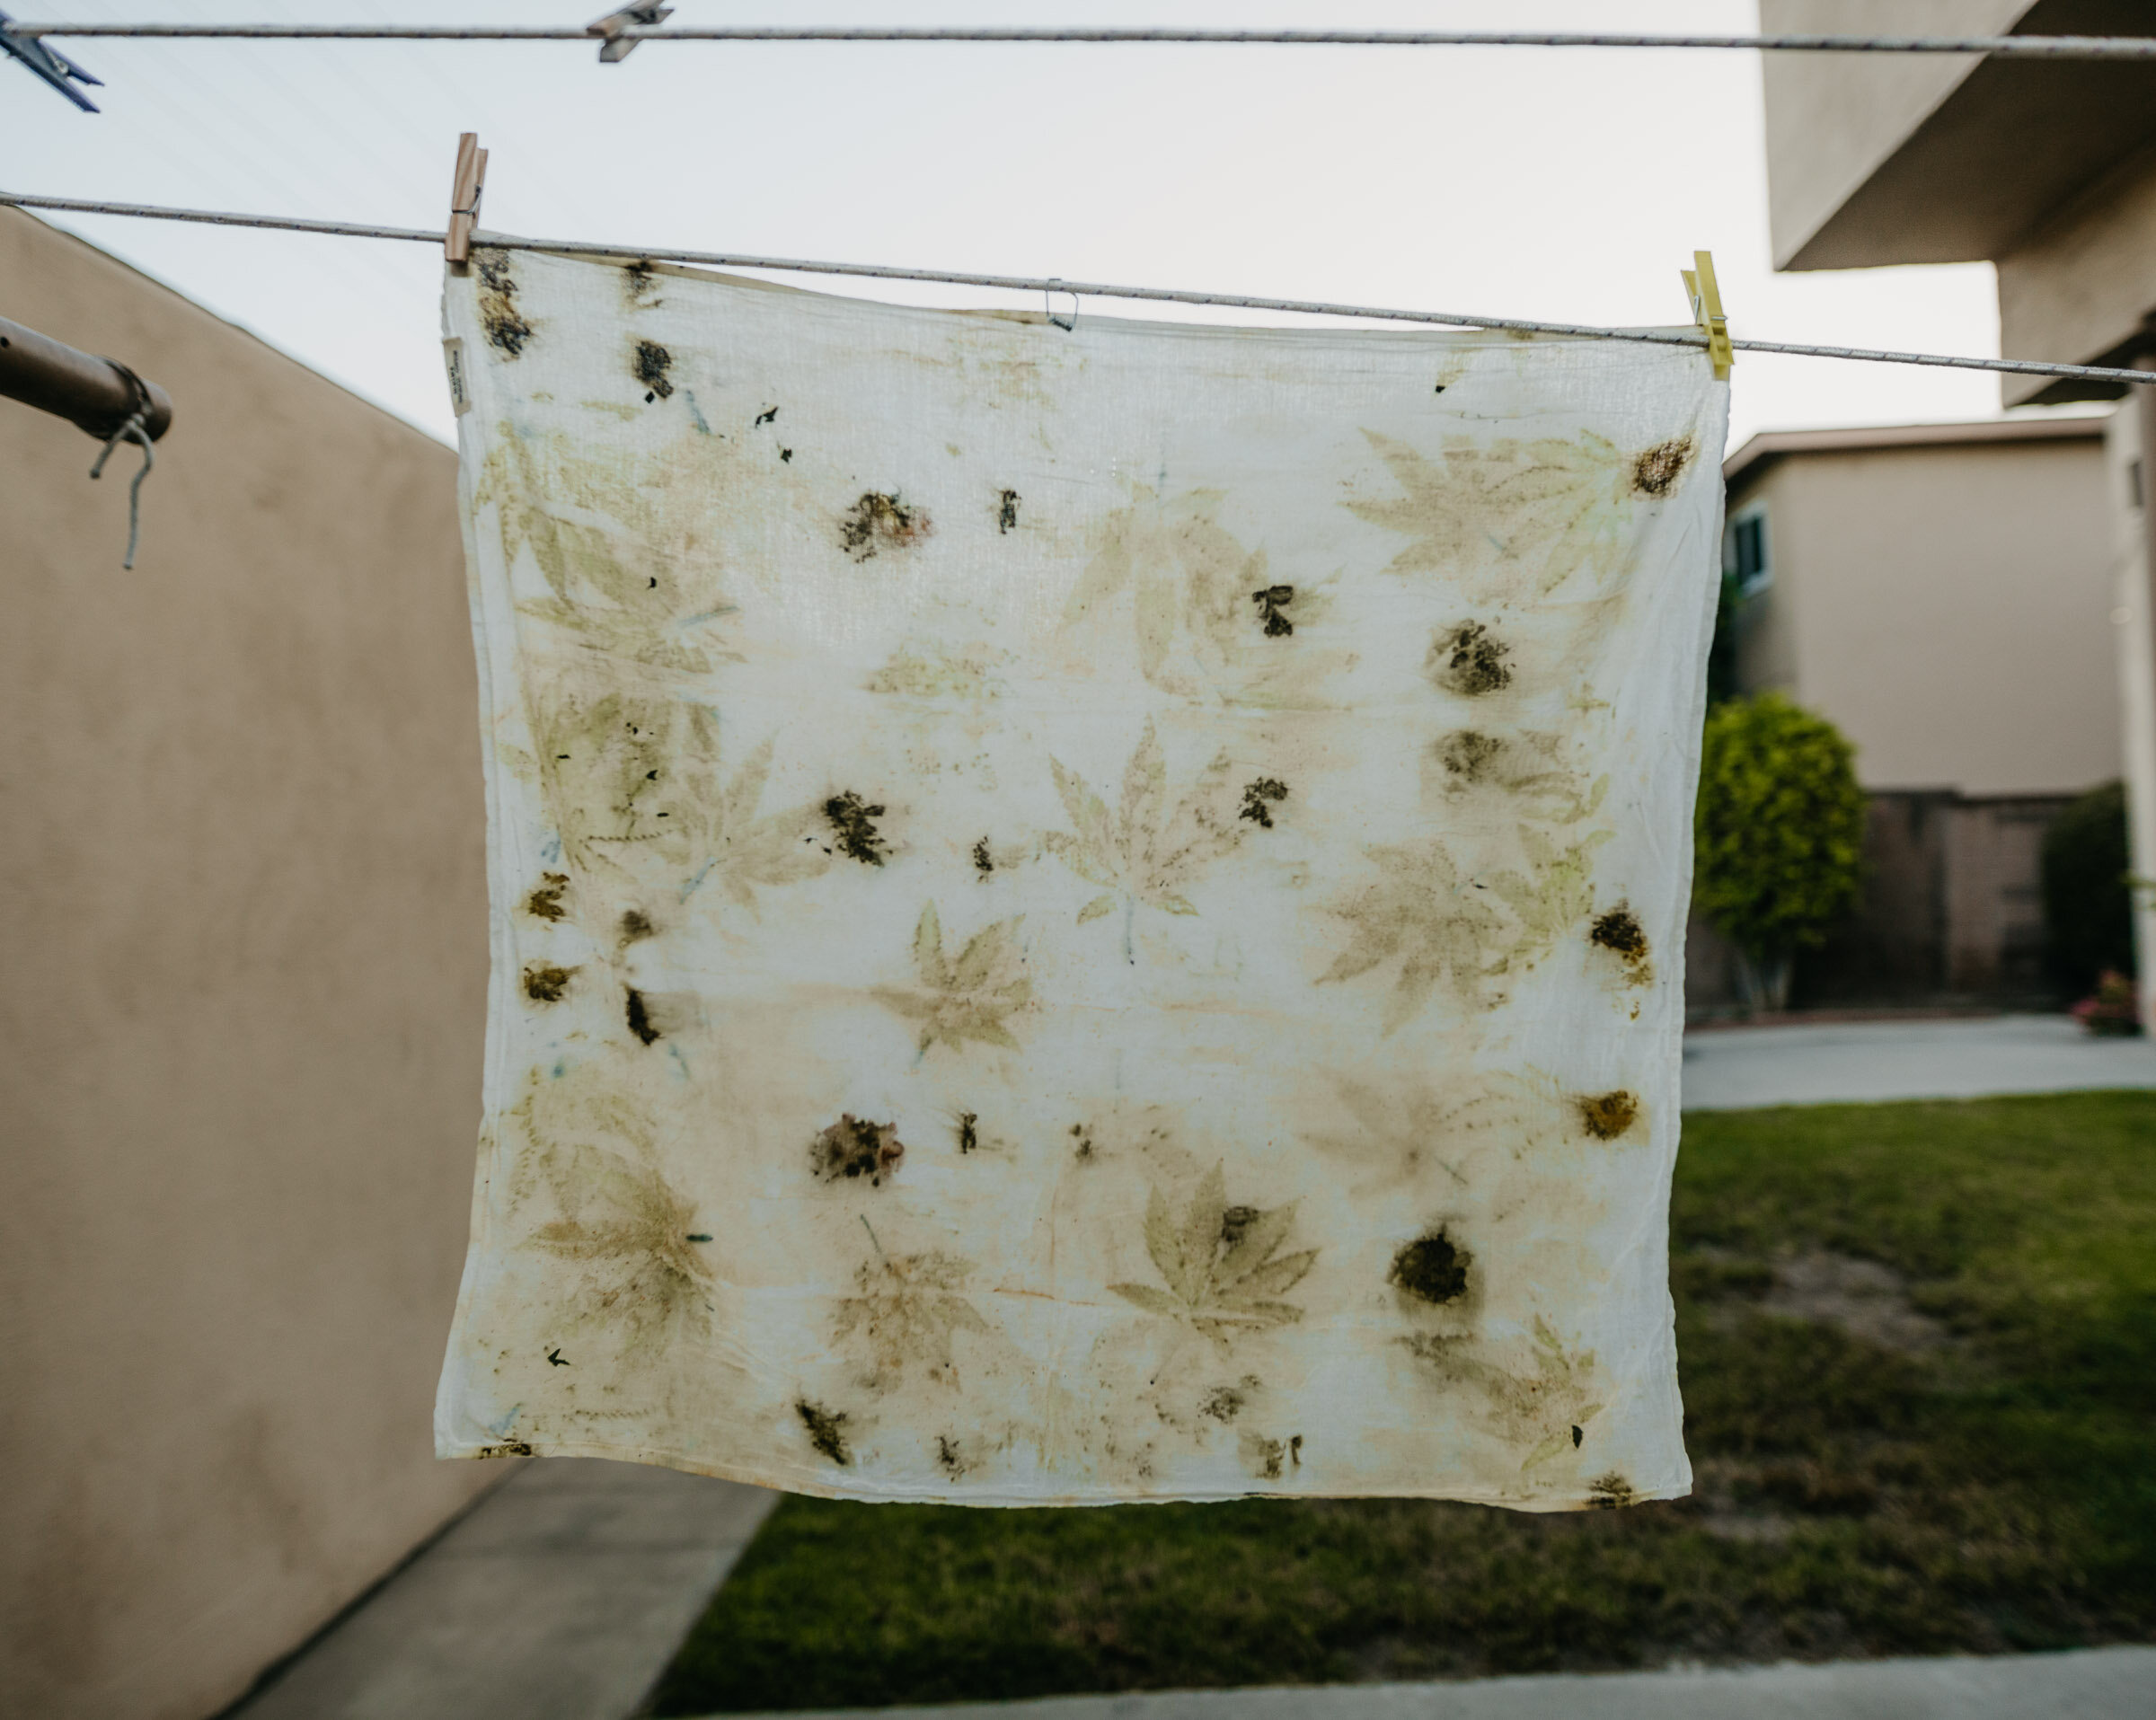
And then I eagerly unfolded my rectangle and got SO excited. It worked!!!! Unfortunately, the marigolds in my composition turned into a mushy brown … I’m sure that happened during my trial and error period with the cannabis leaves, because I definitely spilled boiling water on my fabric by accident. But it’s not too bad, I kinda like it.

After this, I just let it hang in the sun for another day! I’ve decided to somehow make this more of an art piece in my home, opposed to a wearable item. Honestly, it just looks like a dirty rag when I scrunch it up.
EDIT: I later learned that this process is called Eco-Printing and there are A LOT of awesome resources on the process. So I’m eager to try this again in the future.
So part 2 of this project (which is actually the main part) will be extracting color from the rest of my dyestuffs and immersion dyeing my shirts. I’ll probably make that it’s own blog post on here soon :) In the meantime, check out more photos from my steam printing project below.